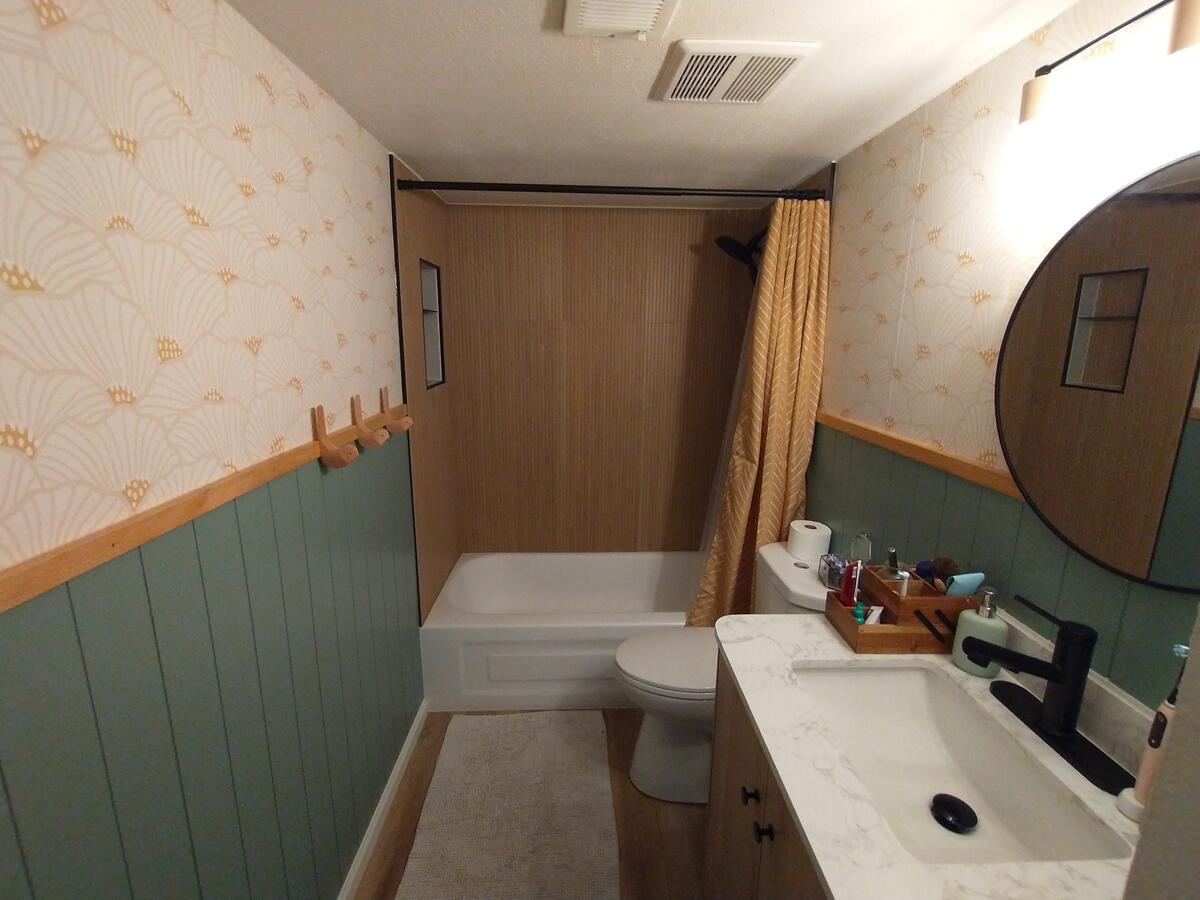
After many challenges and a lot of work, one of the bathrooms in our house is remodeled! This is a crazy long post, mostly because it was a crazy long project.
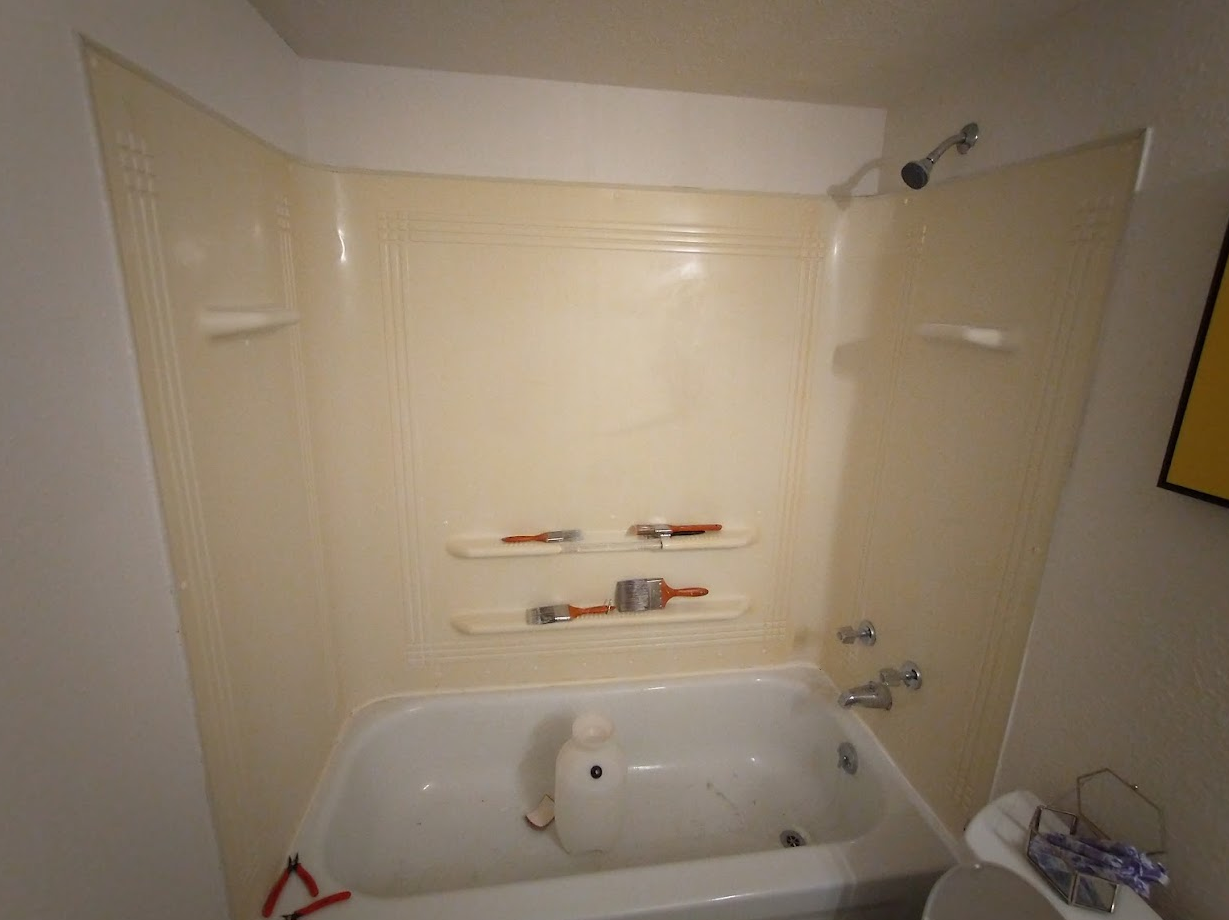
We wanted to remodel both of the bathrooms in our house this year. Both had steel tubs with plastic surrounds, the upstairs surround was cracking and we knew that the downstairs shower would leak into the wall if we tried to use it. Plus, the cabinets in both bathrooms were made with particle board that had absorbed 4 decades of spills, so they were pretty gross. We couldn’t afford to do both, though, so we decided that I would remodel the main-level bathroom, and then as soon as it was ready to use we would hire contractors to do the harder upstairs remodel.
Demolition

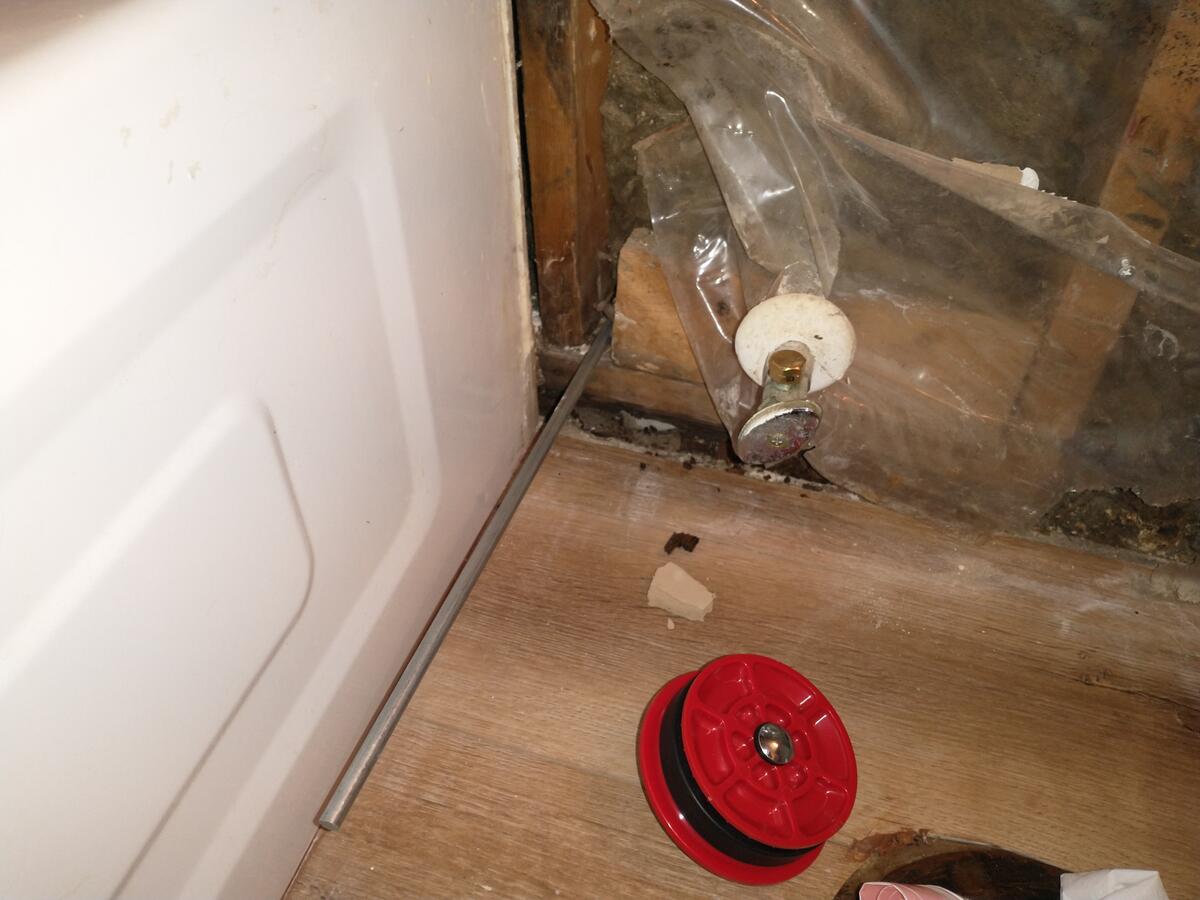
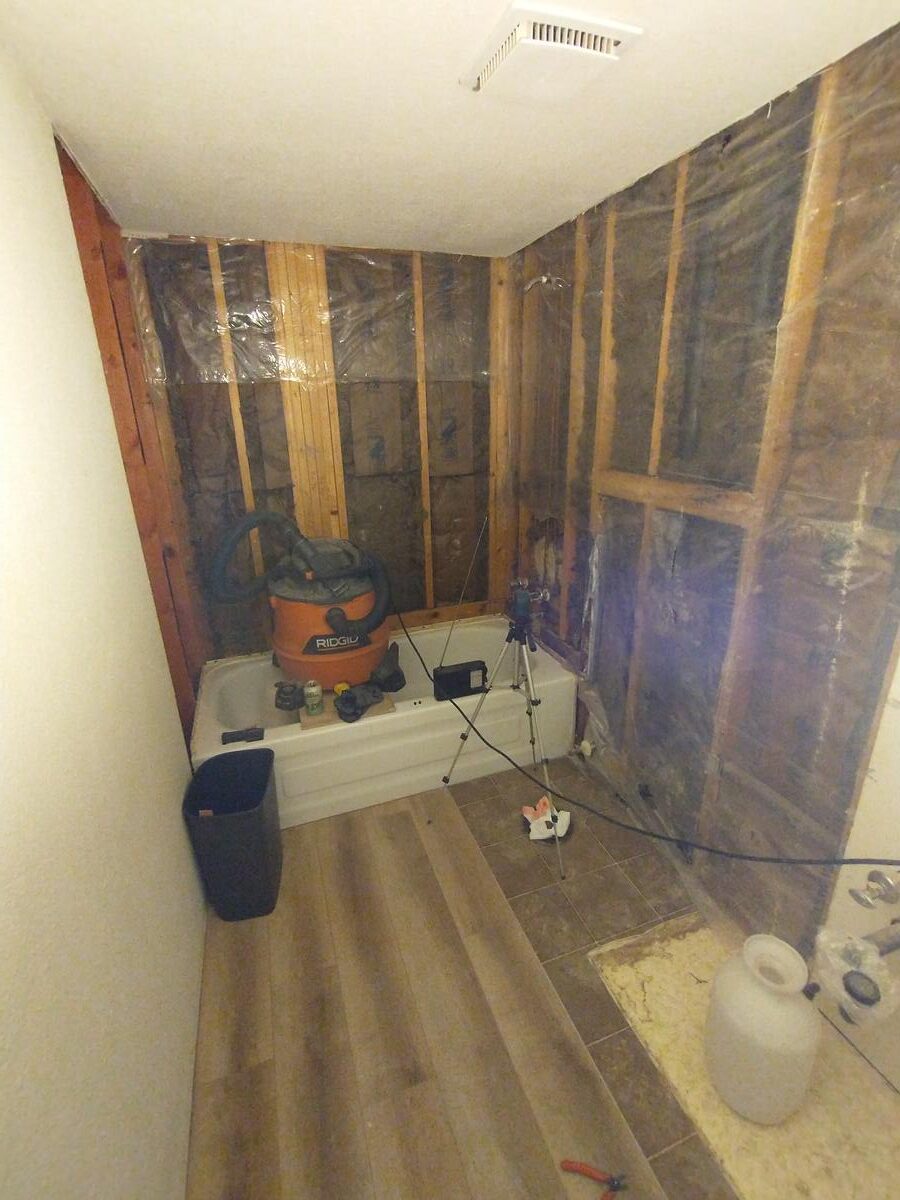
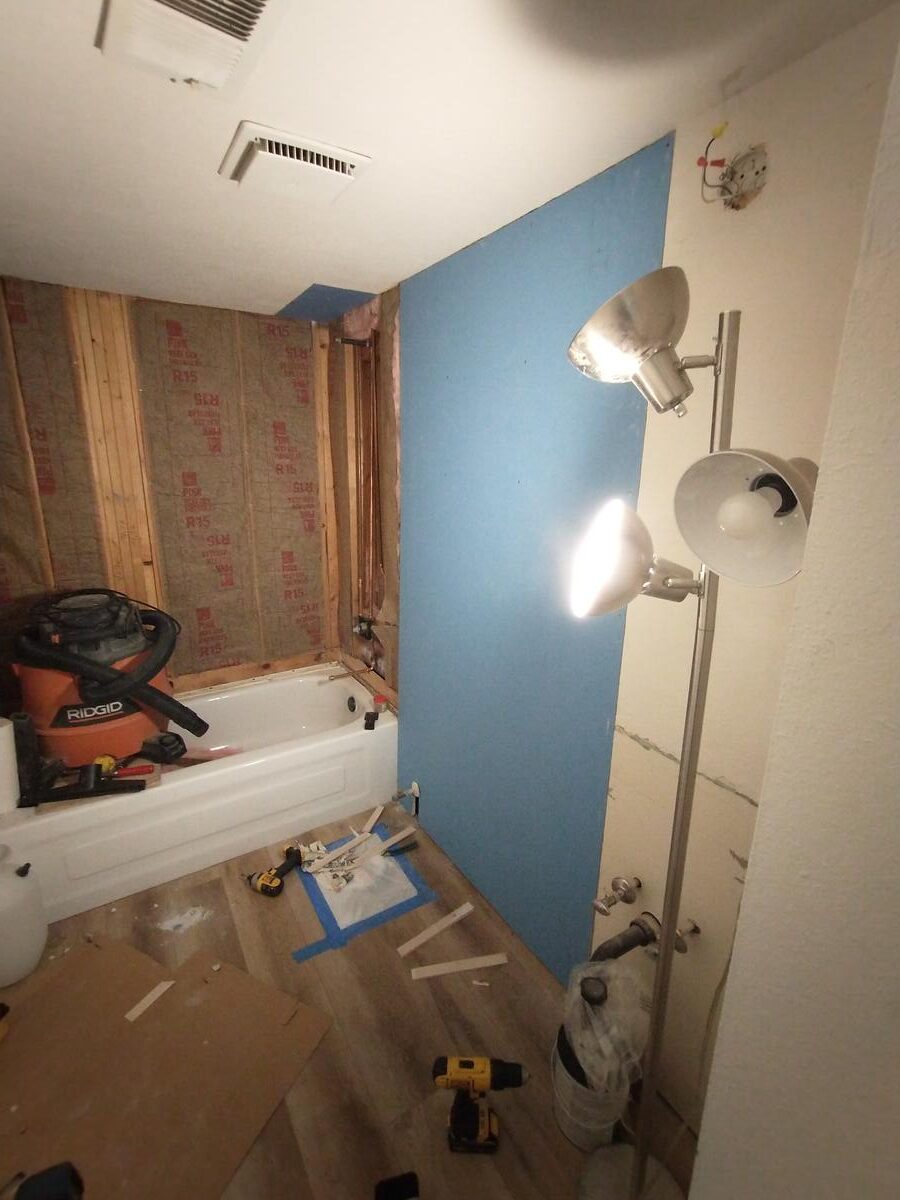
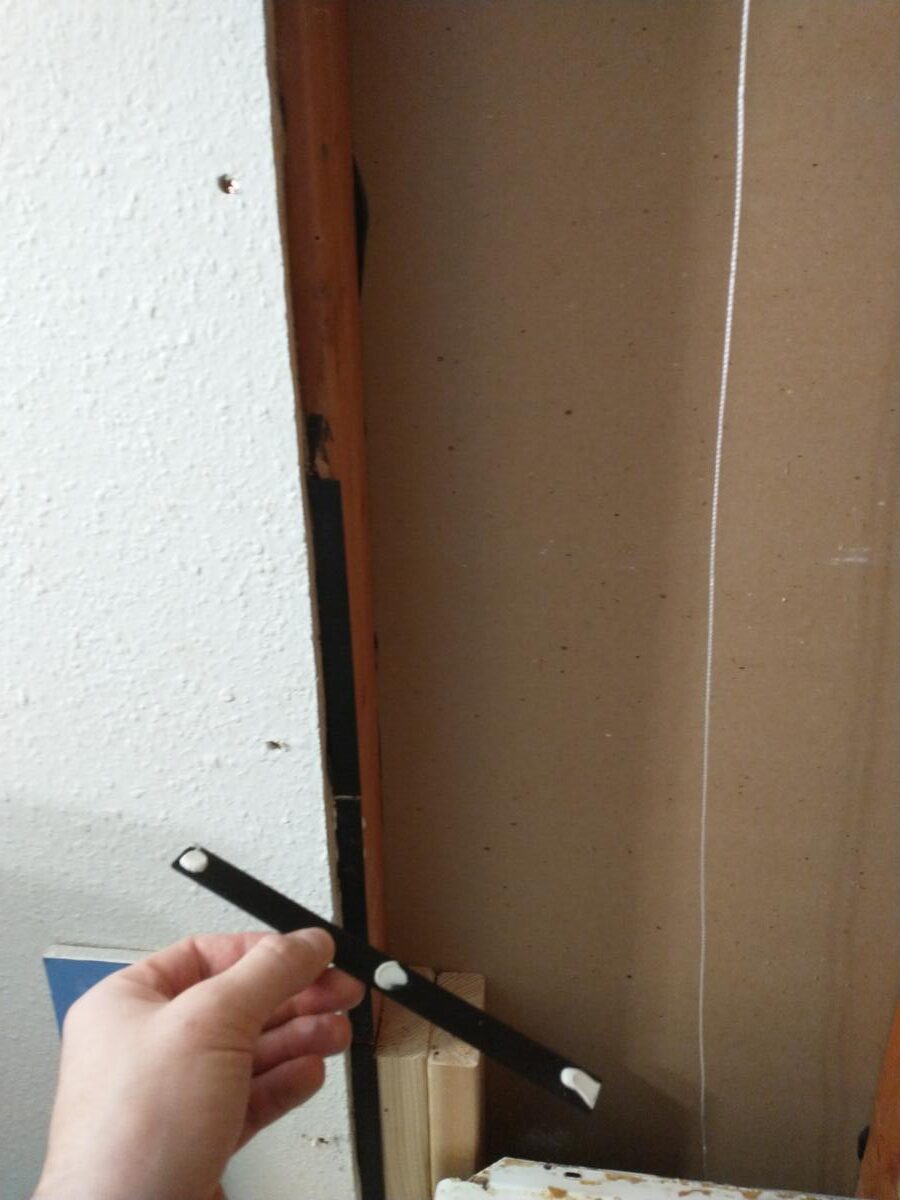
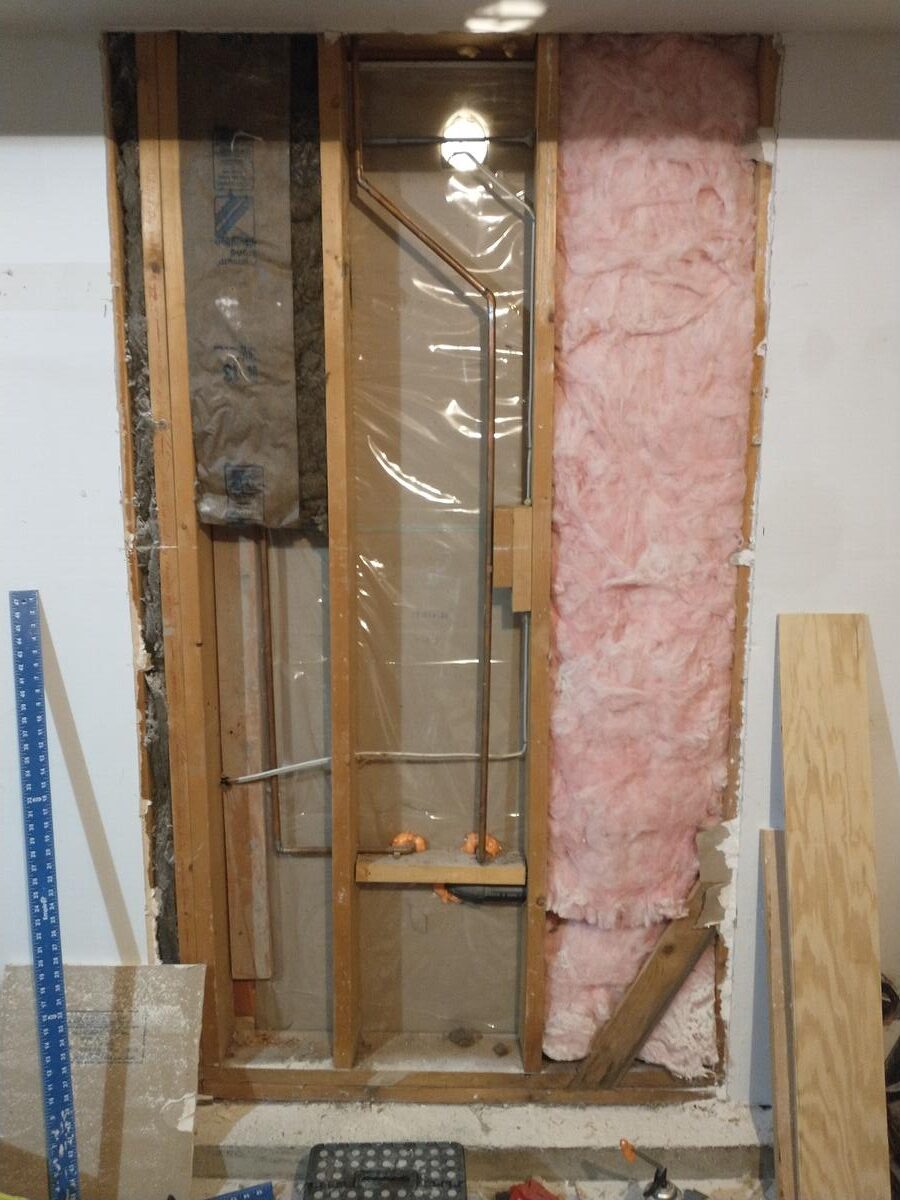
I ripped out the tub surround and traced the extent of the leak. The tub faucet had a threaded fitting with the same thread as a garden hose, but the o-ring had worn through and the threads weren’t pipe taped, so when you pulled the stopper to turn on the shower head the water would just spray back into the wall. After seeing it happen once, we stopped using the tub in this bathroom. I traced the extent of the water damage and ripped out all the damaged drywall, along with the old vanity. This wall was built with a doubled-up sill plate, and there was a little bit of rot on the bottom one of the two pieces, but not enough to go all the way through and certainly not enough to cause a structural issue. I scraped it out as much as possible, and eventually filled that gap with insulation foam.

There was also water damage in the ceiling just under the upstairs tub, because of course there was. I also traced out and cut a rectangle out of the corner of the ceiling where it was soft and squishy, the filled that in with new sheetrock. This area had already been patched once before, so I was a bit wary of leaks from the upstairs bathroom. On the other hand, having this big hole in the ceiling was very useful because I could get photos inside the ceiling that would be helpful for planning the remodel of the bathroom above this one.
Floor
We decided to use a freestanding vanity, because I like the way they look and how easy they are to replace down the road. The main benefit is you build the room as if it wouldn’t have a vanity, and then you put one in after the fact. The flooring and trim go behind the vanity, so in once sense it is a little bit of extra material, but in another sense it is actually less work. Since we were doing a freestanding vanity, I pulled up half the flooring in the room and cut new flooring to completely fill the area. This flooring was put in both bathrooms, the kitchen, and the dining room by the company that flipped our house. When we remodeled the kitchen and dining room, I carefully removed it and saved it for future projects. We are still trying to use all of it up before buying any new flooring. It’s luxury vinyl plank (LVP), so it will just going to sit in a landfill until the end of time if we throw it away. Fortunately, though, it’s super easy to work with, so we should be able to use it all up if we’re careful.
Walls and ceiling
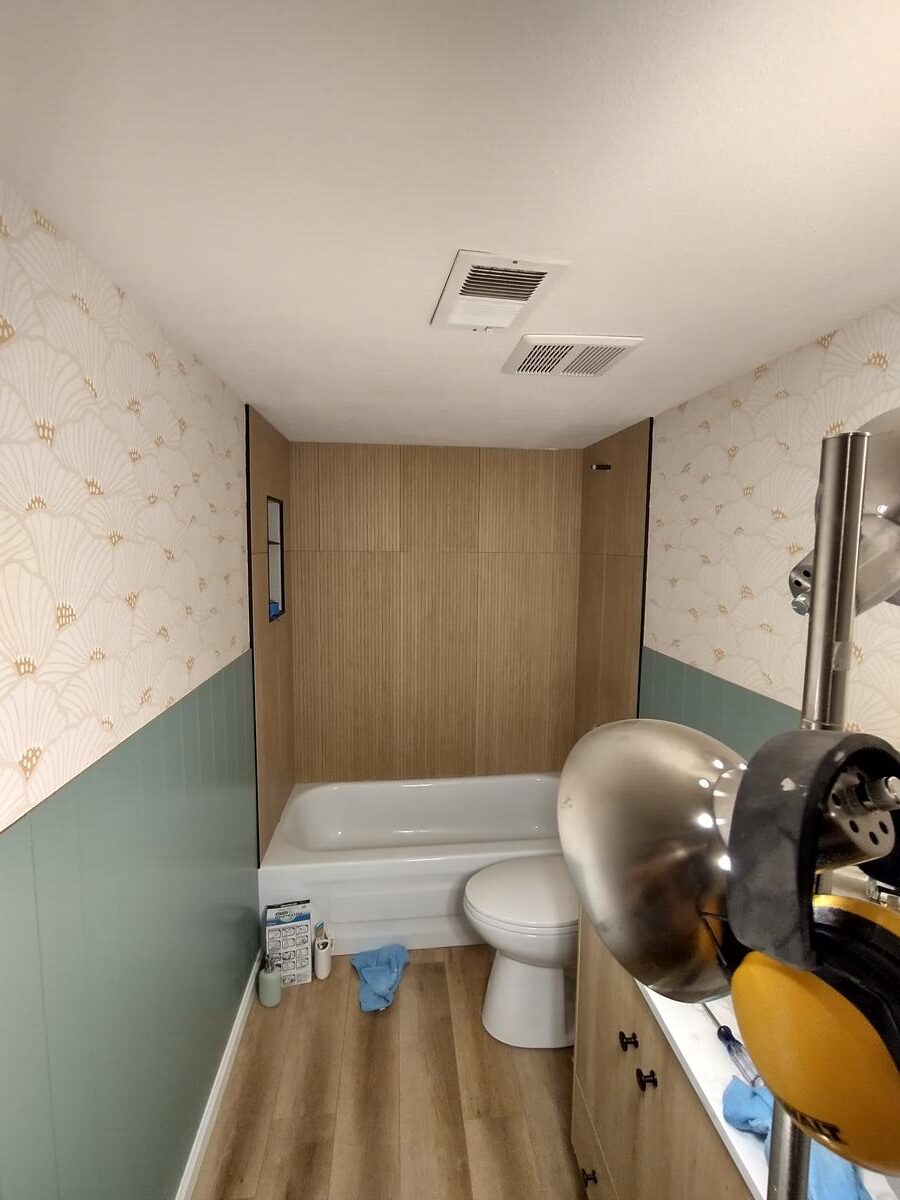
After the plumber was done, I put in new drywall to replace the water damaged stuff. We had decided that this bathroom needed to be fully water-proof, so the walls would be a stack, in order, of:
- new, undamaged R15 fiberglass insulation
- mold and mildew-resistant drywall
- mold and mildew-resistant primer
- wallpaper on the top half
- shiplap on the bottom half, painted with exterior trim paint
Since we were covering the walls with wallpaper and shiplap, I made the drywall smooth and sanded down the texture on all the other pieces I didn’t rip out. That’s how I learned that the existing walls already had a layer of wallpaper in them! I found several places where the wallpaper under the paint had bubbled, and had to cut those bubbles out and fill the voids with drywall compound. I painted the walls and ceiling with Kilz mold and mildew-resistant primer.
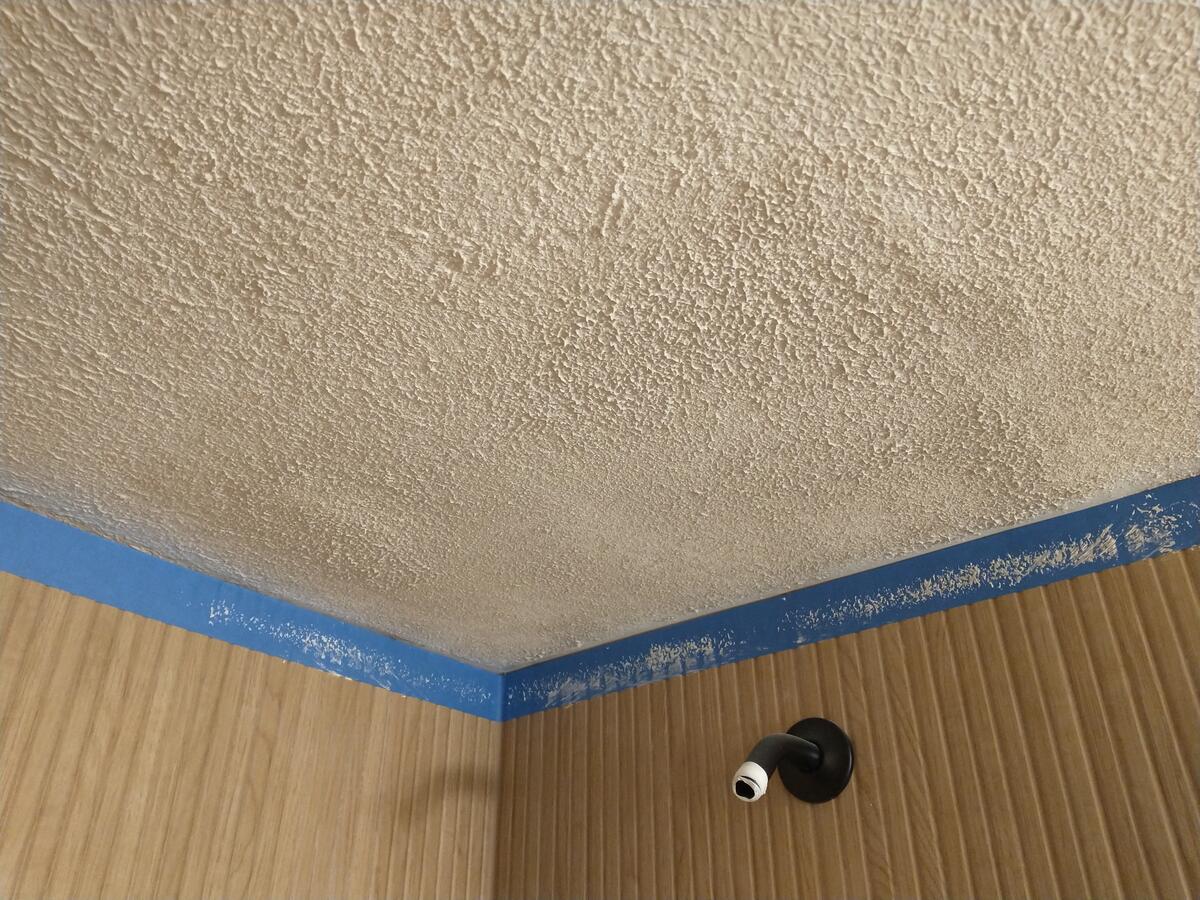
It took a while to figure out, but the ceiling was probably textured with one of those rollers that you use to apply deck stain. The ceiling texture is rough, pointy, and sharp. I was able to almost perfectly match it using a deck roller.
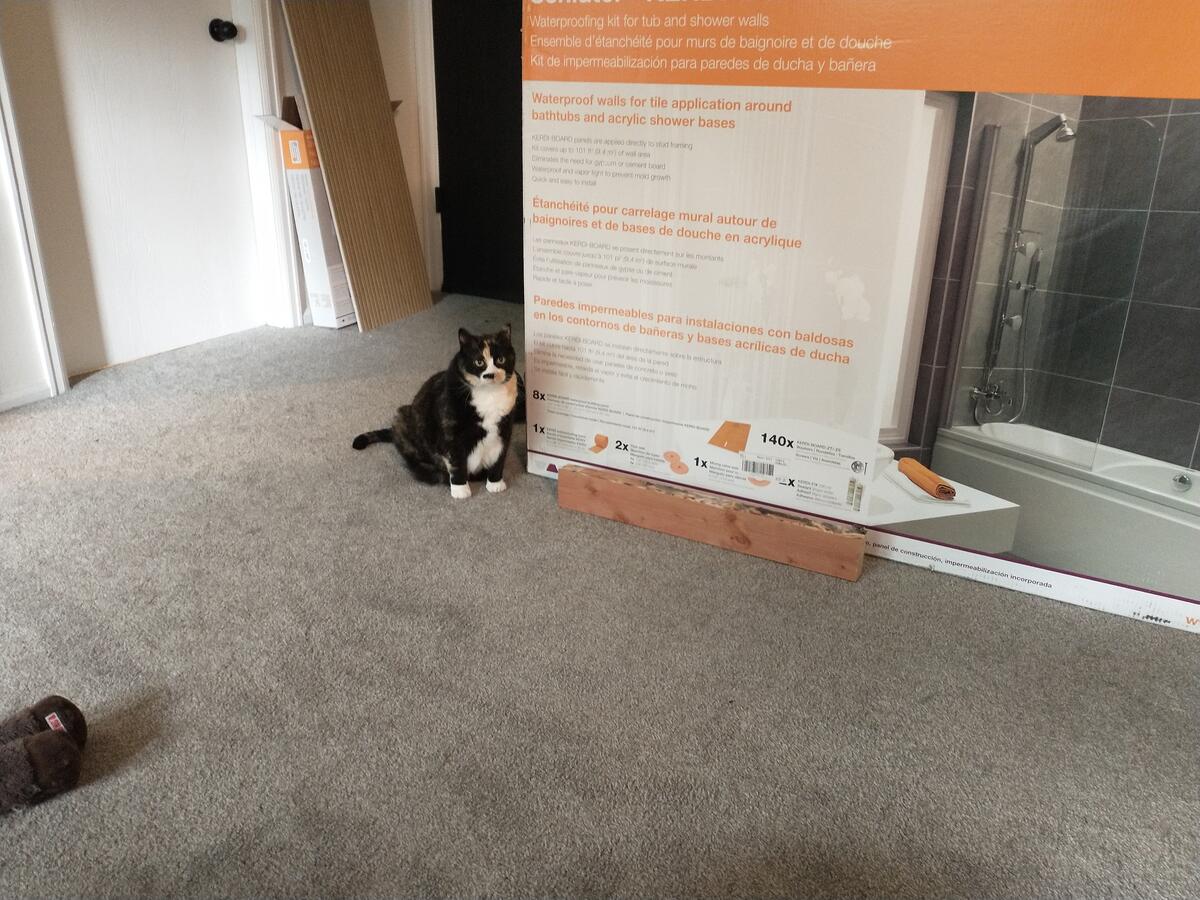
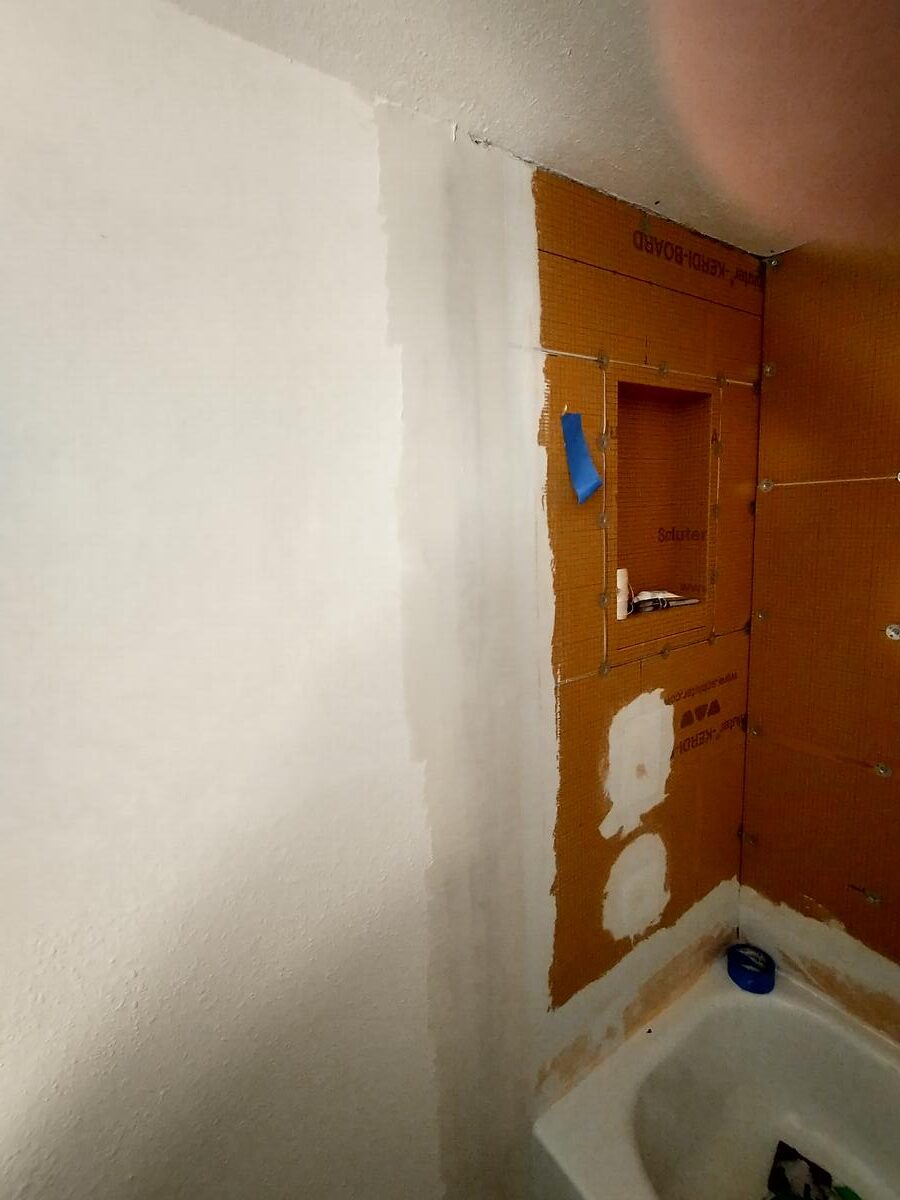
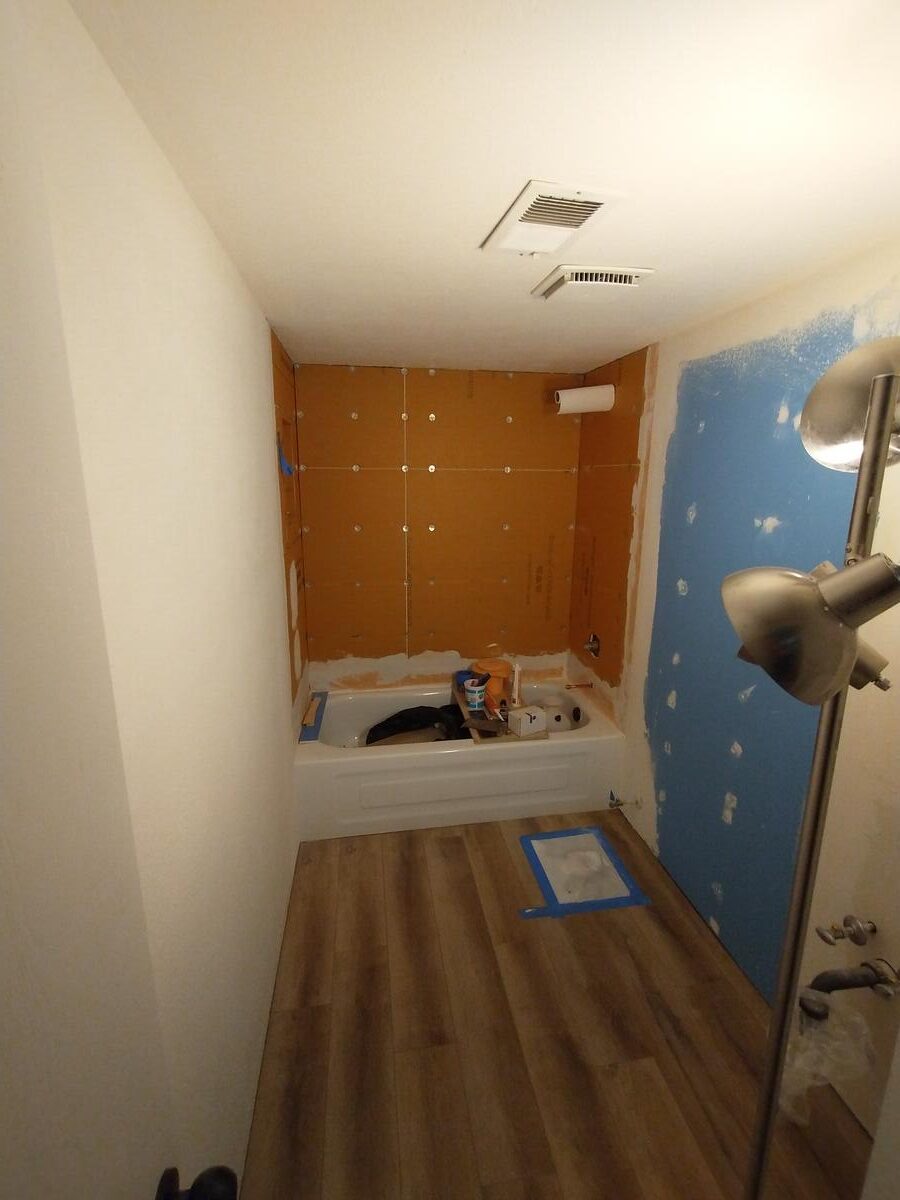
For the tub surround, I opted to use Schluter Kerdi-Board as the backing material. Kerdi-Board is one of many lightweight waterproof tile backer boards, and is a significant step above the durability of drywall-based backer boards while being much easier to work with than cement board. I would normally prefer cement board because it is cheaper, stronger, and more recyclable than the Kerdi-Board, but the tub was installed so poorly that it made a foam backer board the only good choice.
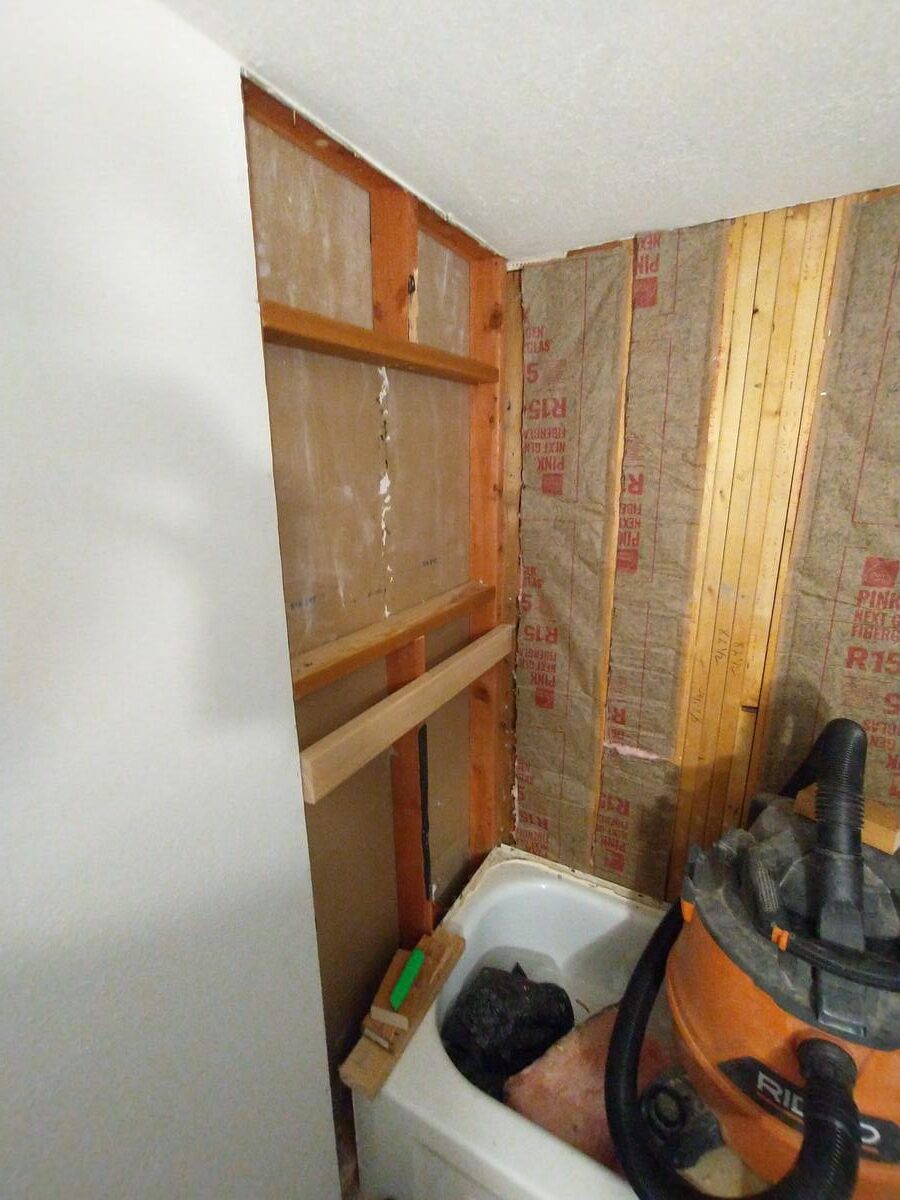
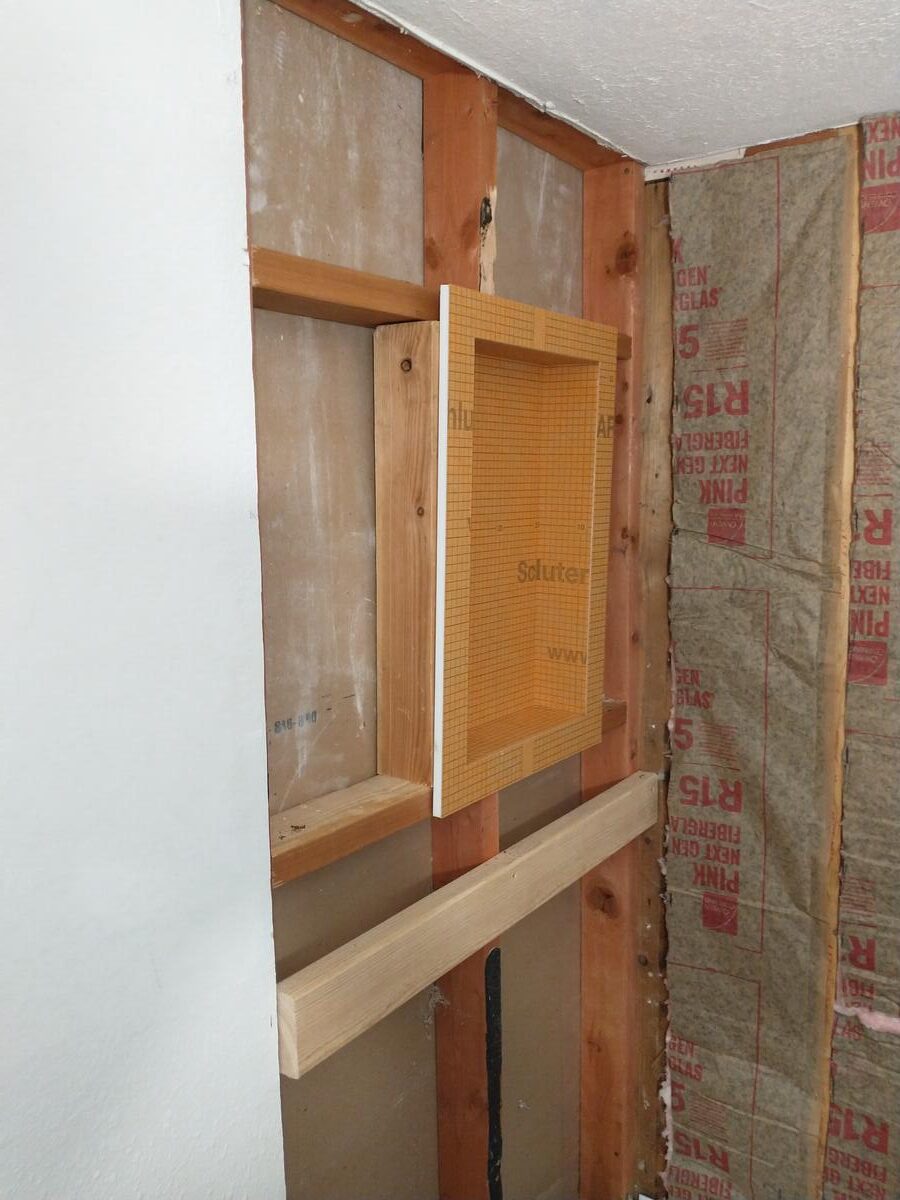
I also framed in a niche for the shower, and had to move some shelves in my office closet to account for the space. I bought one of these prefabricated Schluter Kerdi-Board niches, and it worked pretty much fine, although it was a tight fit. I would have been more concerned about how tight it was, but the other side of this wall is a closed with the drywall held on by nails, so the worst-case scenario is that it would push that drywall out a little bit.
I replaced all the nails holding the tub flange in place with screws, because screws can actually hold an axial load, and tightened those screws so that the tub flange was a bit straighter without over-flexing it and cracking the enamel of the tub surface. With the flange straightened, it hit the Kerdi-Board right in the middle when I put it up on the wall. One benefit of the Kerdi-Board over cement board is that I was able to make a little knife jig and cut a notch out of the back edge of the board, which allowed it to extend slightly over the tub flange. This is a big improvement for tile adhesion near the surface of the tub because the wall can extend down to where the tiles will go instead of stopping an inch or so above the tub.
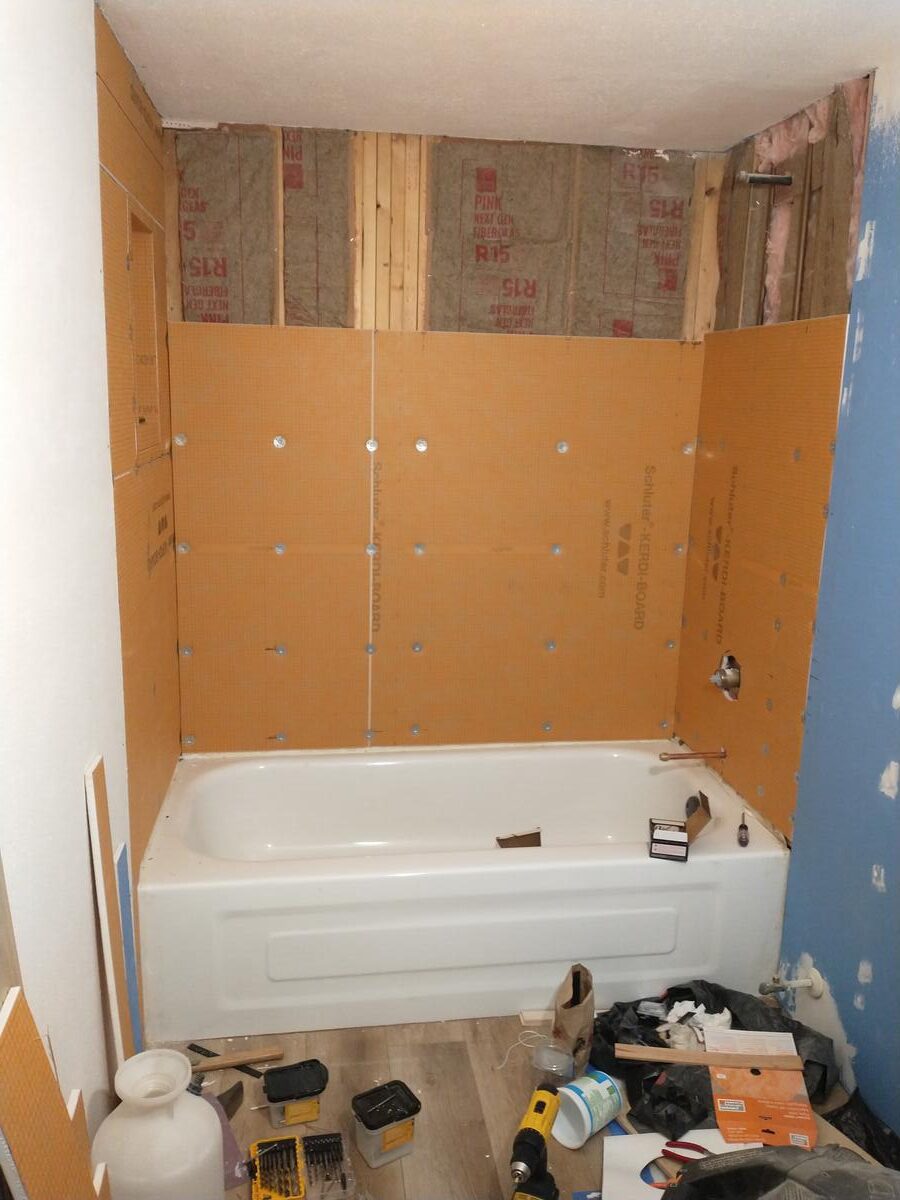
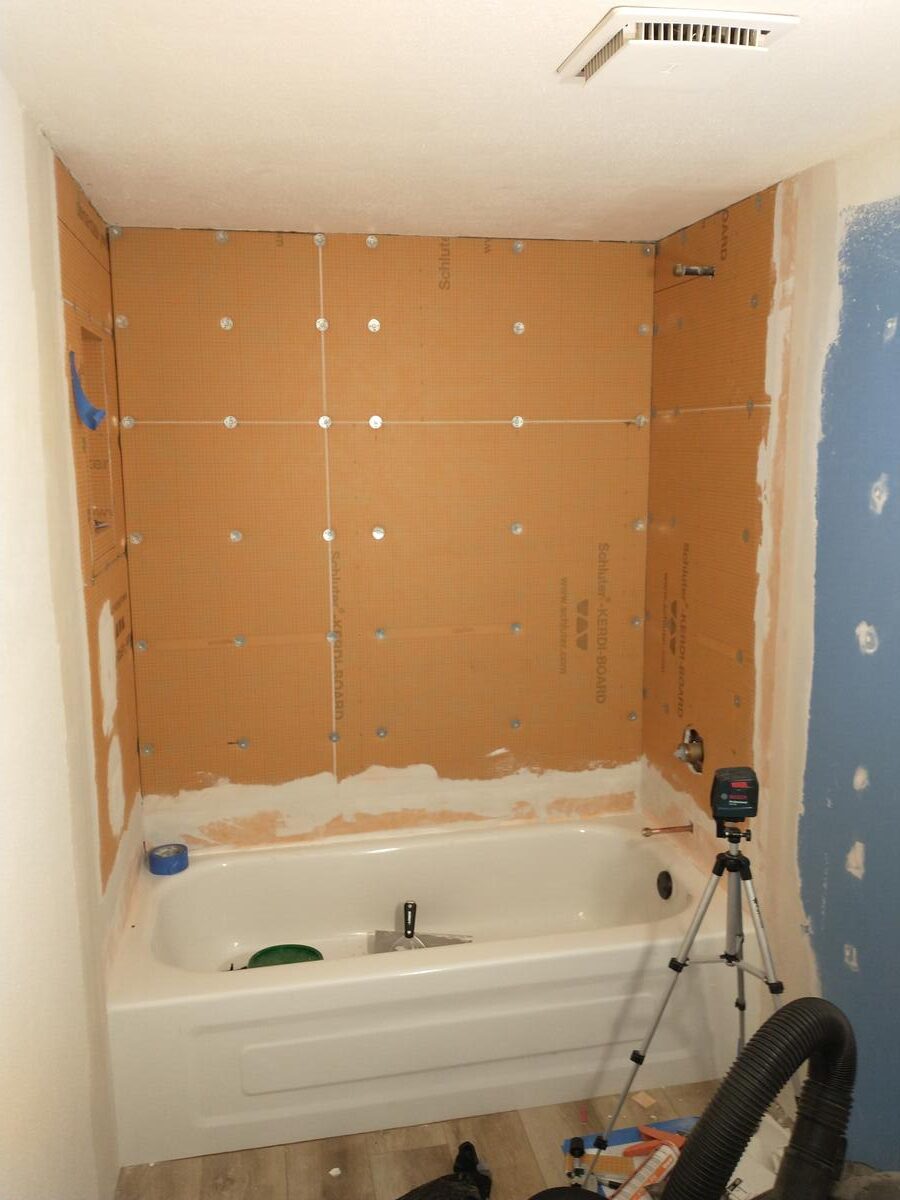
The tub was installed at a significant angle, like half of an inch over the length of the tub, in both directions so that one corner in the back left is almost an inch below the opposite corner to the right of the tub faucet. The room isn’t straight and the walls aren’t plumb, so I had to plane down studs on one wall and build up studs on the other so that the backer board would be straight. With the foam board, I was able to hold it up and press all over it to see if it gave at all, which allowed me to really effectively true the walls. At this point, I was in a hurry to get the toilet and sink installed, so I just did the waterproofing where necessary before installing the wall paneling.
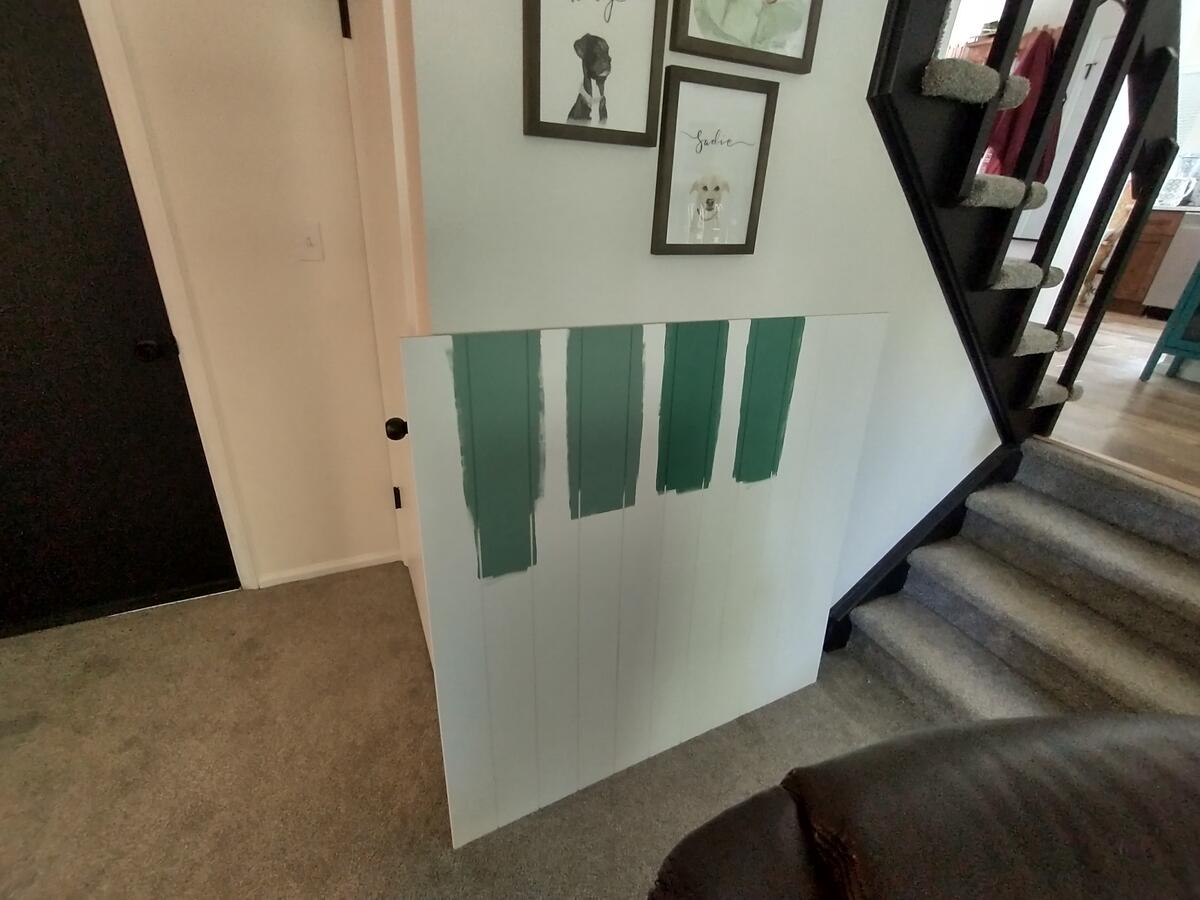
Wall paneling
We bought shiplap-style paneling at Home Depot and tested some different paint finishes out. With the paint selected, I painted all of the grooves with the panels laid out flat in the garage, then installed the panels and painted the rest.
I used leftover caulk to level the shiplap joints against the wall, and after installing the baseboard I caulked the top and bottom edges everywhere. I have some germophobic tendencies, so it is important to me that, when the toilet inevitably overflows some day, the water will be contained on top of the waterproof floor and in the bathroom for an easy cleanup.
Toilet
I really like this toilet, the Niagara Stealth 2-part toilet, which I bought from Home Depot for about $150. I like it because it has a stupid name, almost never clogs, and is very efficient (in that order). It uses 0.8 gallons per flush, and has an interesting system that raises the water level in the bowl by using the tank water to increase the air pressure in the trap. I tried to learn more about this “patented” system, but after several hours of looking I was unable to find the actual patent. Niagara never responded to my request for more information about it.
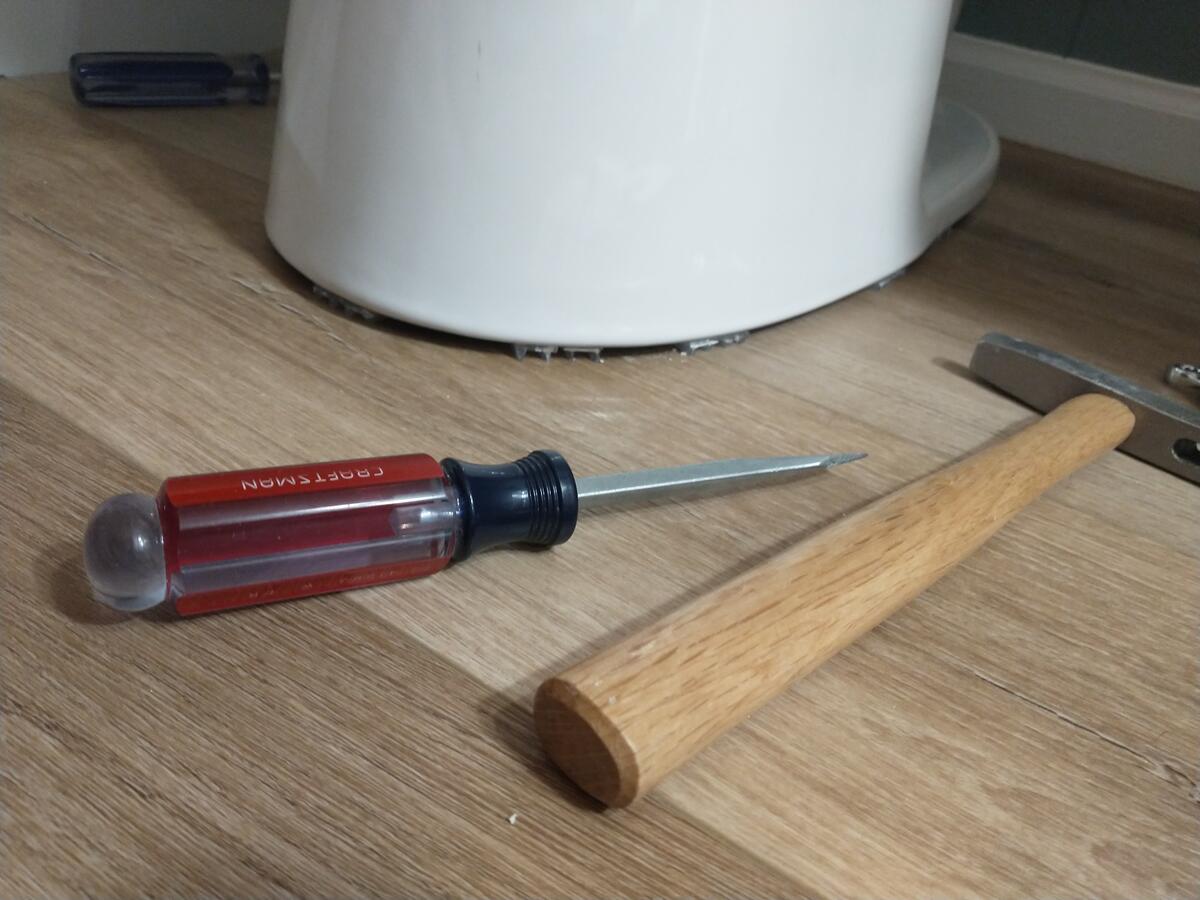
I live in Fort Collins, Colorado. Part of why I love this toilet is that it’s basically free here. Last year the city was offering a $75 (now $90, as of this post) rebate for water utility customers to replace a low-efficiency toilet with a high-efficiency, high-performance toilet, and this one definitely qualifies. Sometimes the city offers a bonus double-rebate, making the total rebate $150 ($180 as of this post). The way this toilet is priced, I only paid the tax.
In case you live in Fort Collins, Loveland, Longmont, or Estes Park, here is a link to the current water incentives: https://efficiencyworks.org/wp-content/uploads/CE-Water-Incentives.pdf, and here is a link to the EfficiencyWorks site where you can apply for a rebate: https://efficiencyworks.org/homes/rebates/#residential-rebate. The rebate bonus is based on when you apply for the rebate, not when you purchase the toilet, but you need to provide the receipt for the toilet in the application.
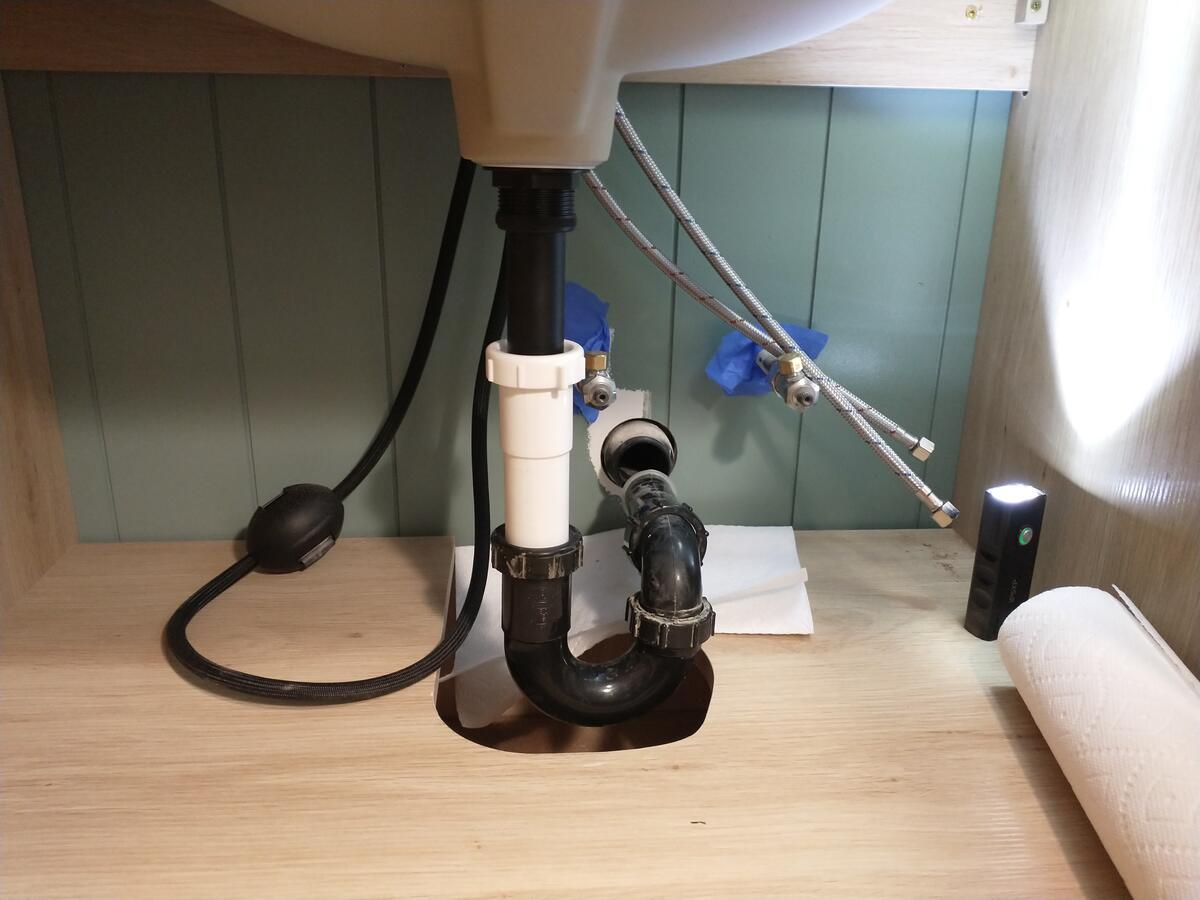
I am afraid to use wax rings to install toilets. When it’s just me dropping the toilet in place, I do not trust myself to smoothly place it the first try. Also, I absolutely hate scraping toilet wax off when I replace a toilet. Luckily for me, there are now many kinds of fancy wax rings that make it easy. For a clean new PVC flange, I like to use waxless rings, which are basically stackable rubber gaskets.
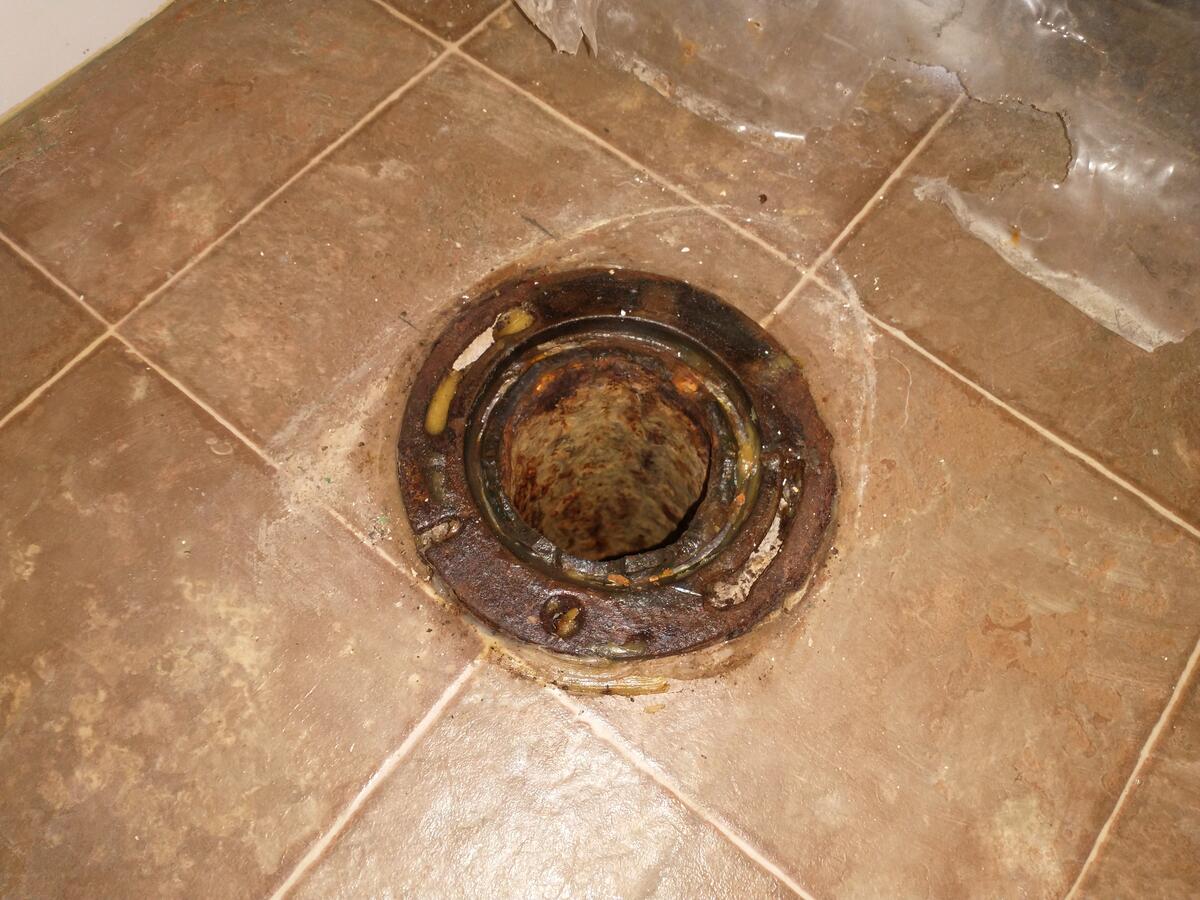
On a flange like this one, though, I would be worried that the rubber would not seal well against the rough surface, so I decided to use the Danco Perfect Seal, which gives you a wax ring on the bottom and rubber gasket on top that is shaped kind of like a ball-and-socket joint. The rubber shroud keeps the wax ring from being fully compressed until the bolts are tightened, and you can reposition the toilet a little bit without breaking the wax seal. These cost something like 4x what a normal wax ring does, but I’m fine with paying $20 to save myself time and aggravation, especially after the toilet rebate.
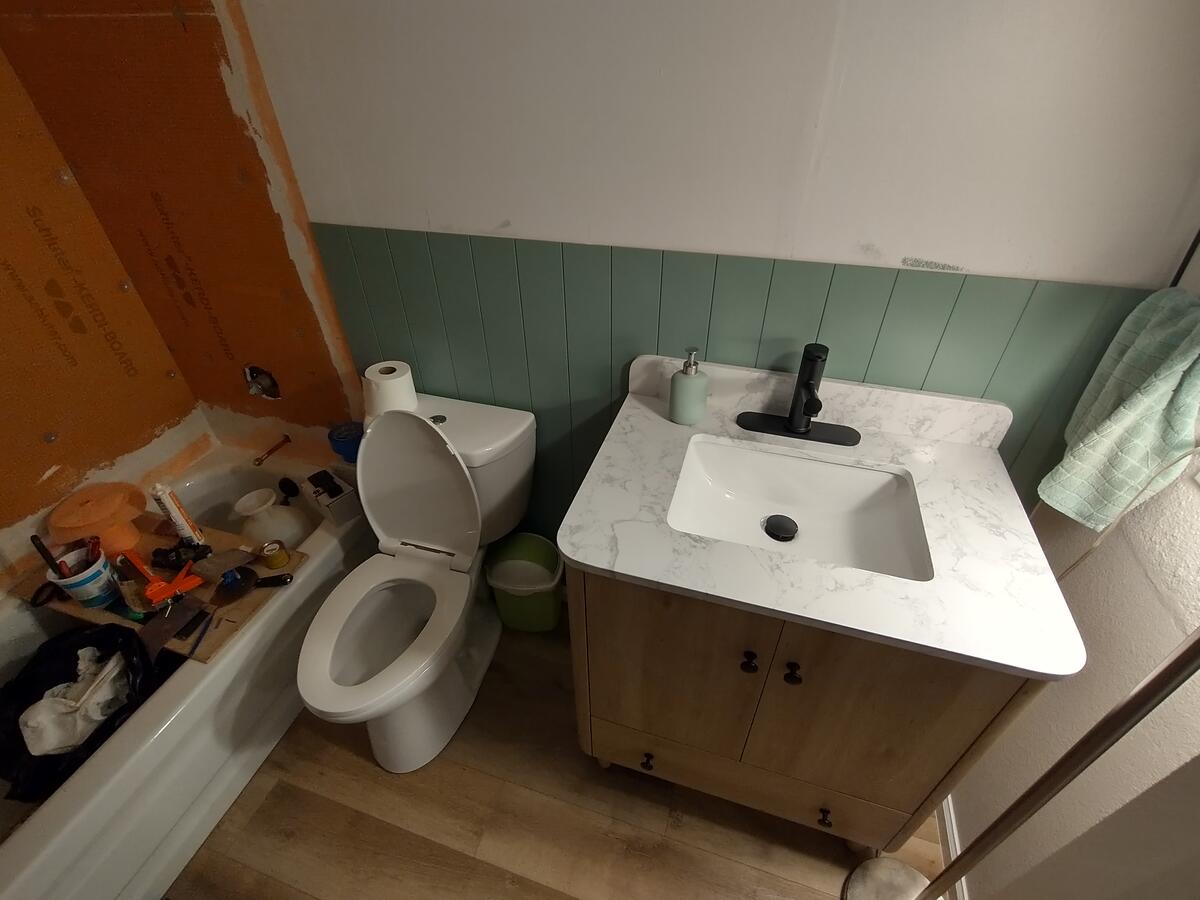
Vanity
We got the vanity from Floor & Decor, and I installed it as usual. It went very smoothly because I already had the garage wall on the other side opened up, so I was able to easily find the anchor points and fasten it to the wall. With the garage side of the wall open, it was also very easy to move the existing light box to be centered over the new vanity.

We originally bought an Ikea floating vanity and were going to put it in the corner, but the walls are so far from a 90-degree angle that it would have looked terrible. We returned that to Ikea and bought this one instead.
Bathroom vent fan
While I was waiting for the mildew-resistant primer to dry, with the bathroom vent fan running the whole time to exhaust the fumes, the bathroom vent fan’s bearings started to whine. This was as good a time as any, so I bought a nicer, quieter vent fan and replaced it.
Cat 6 cable
This tub backs up onto my office closet, so while I was working on the open walls I also drilled up into the next floor and made a wire chase between my office closet’s wall and my bedroom closet’s wall to run Cat6 cables through at some point. I ran the cables, but they’re just hanging out in the wall until I have a chance to actually run them through the house.
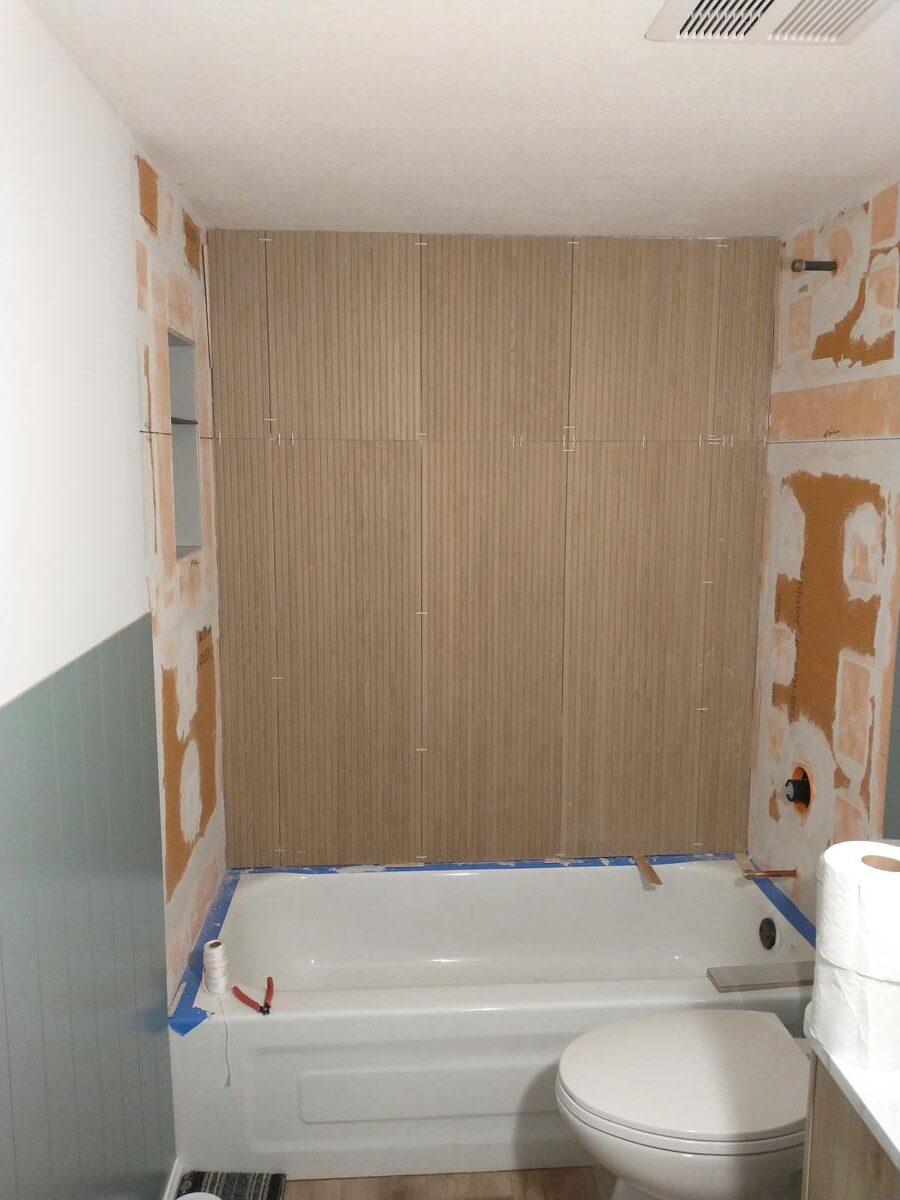
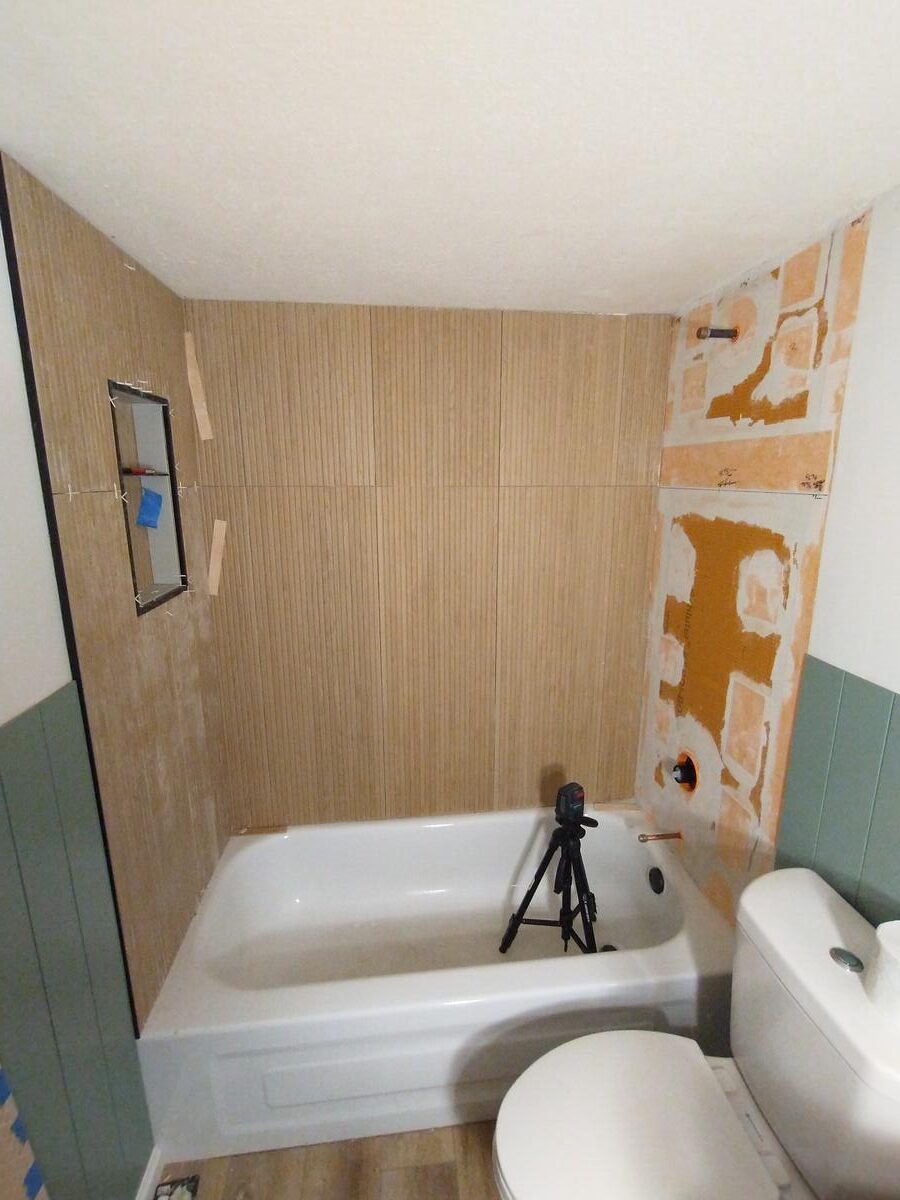
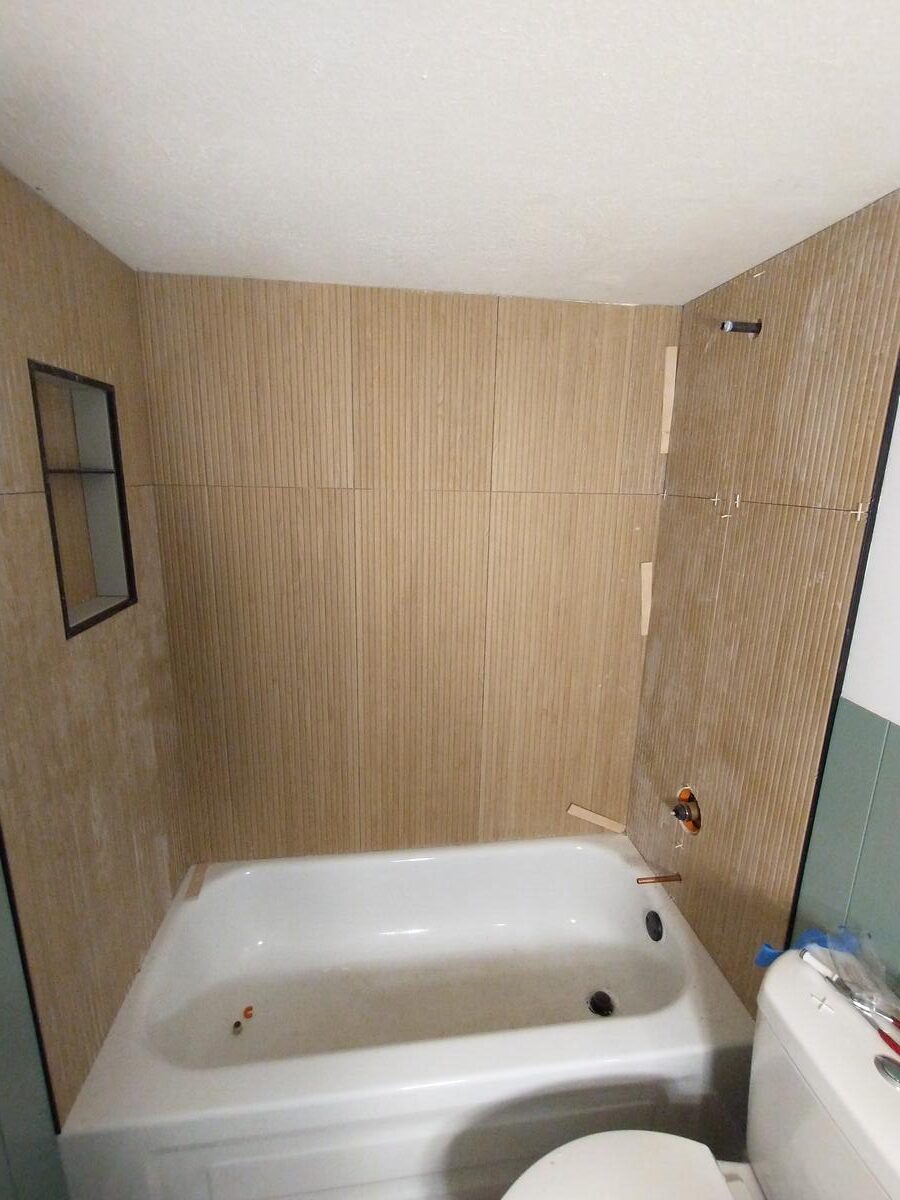
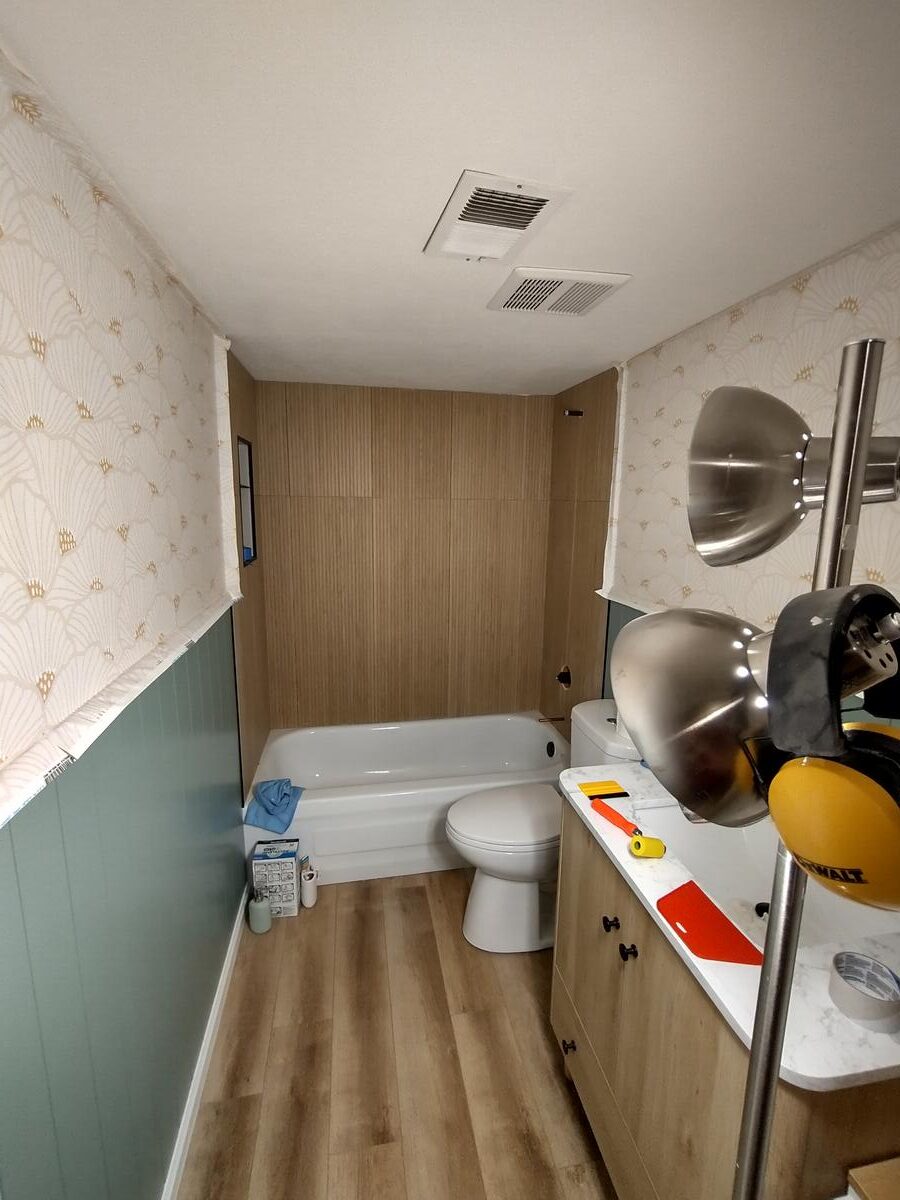
Tiling
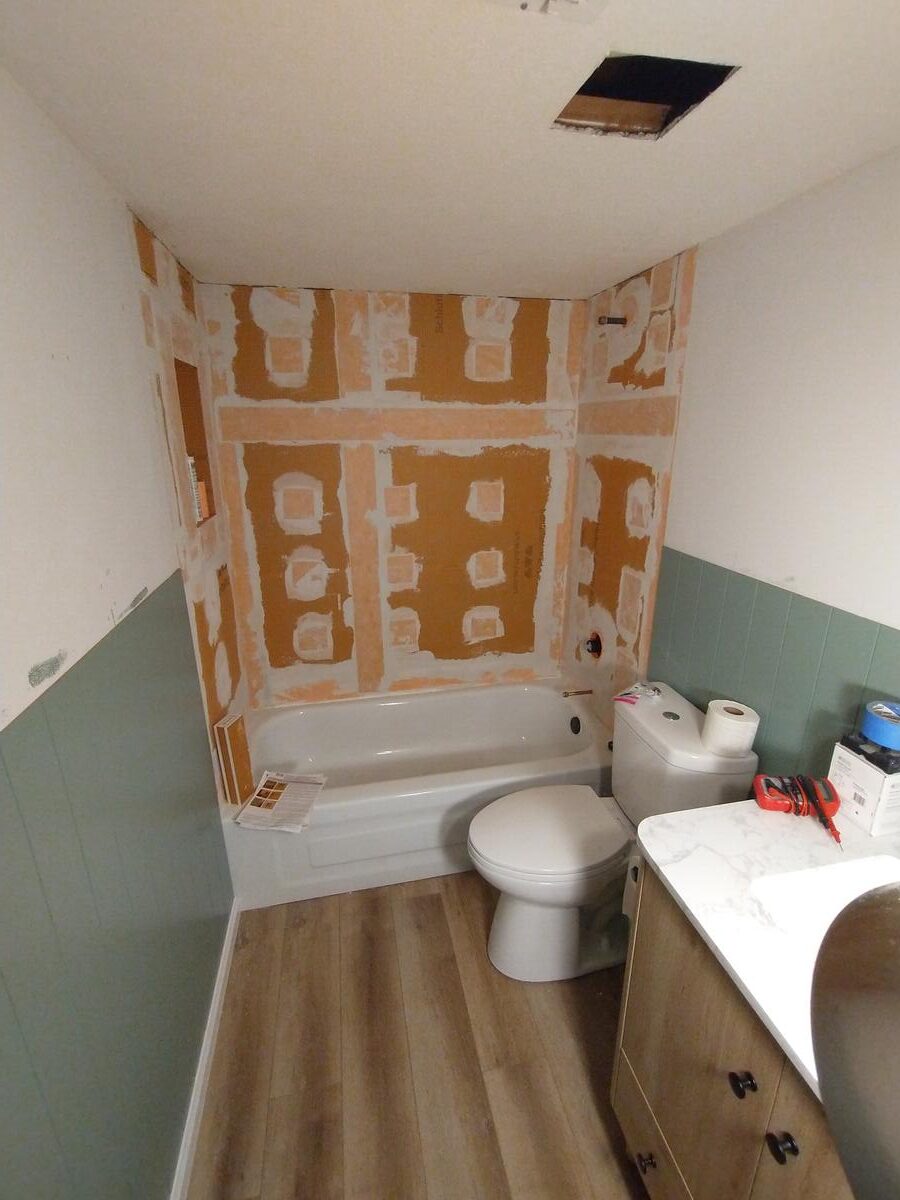
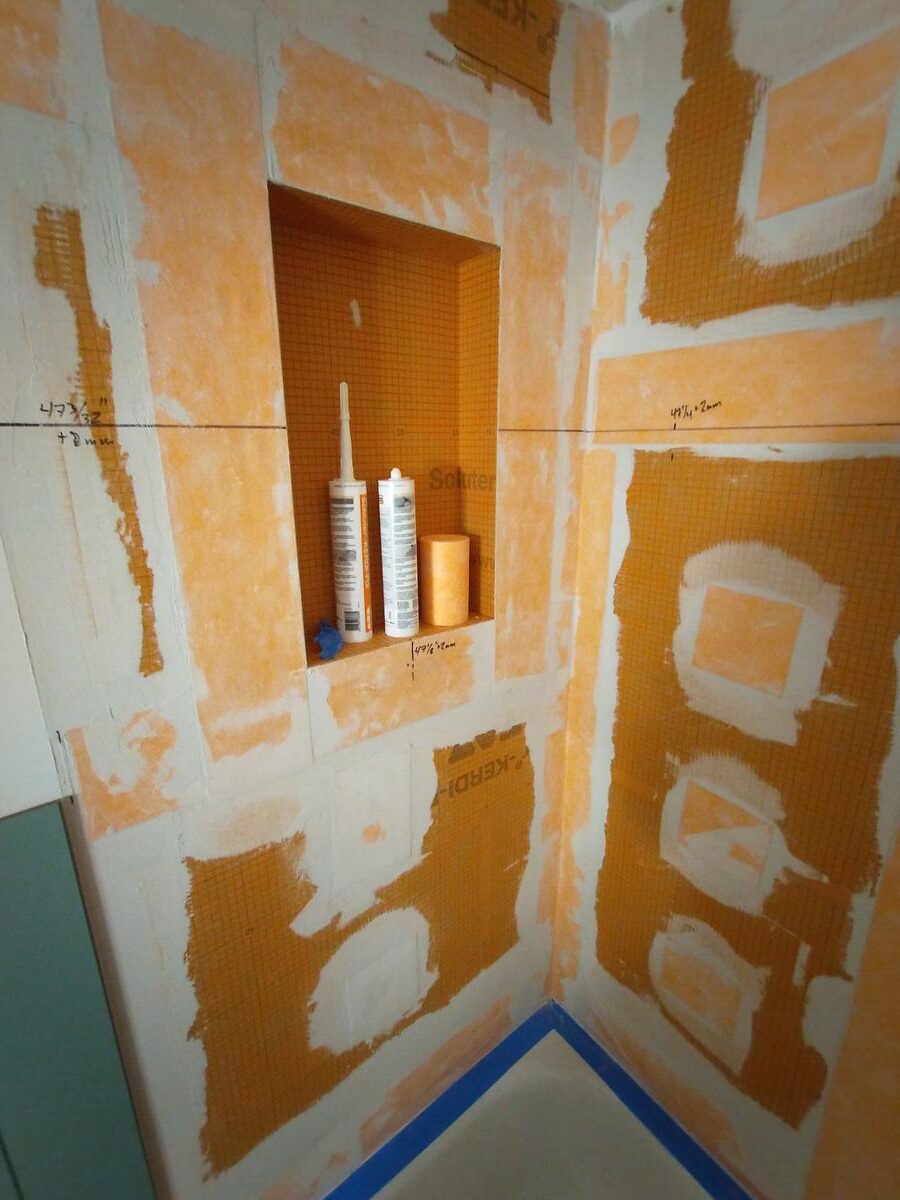

After the bathroom was functional, I was able to start work on finishing the tub surround. In addition to fully sealing the Kerdi-Board using Schluter All-Set, Kerdi-Band, and Kerdi-Fix, I used a folded-up piece of Kerdi-Band to form an angle in the bottom of the niche so that water will drain out.
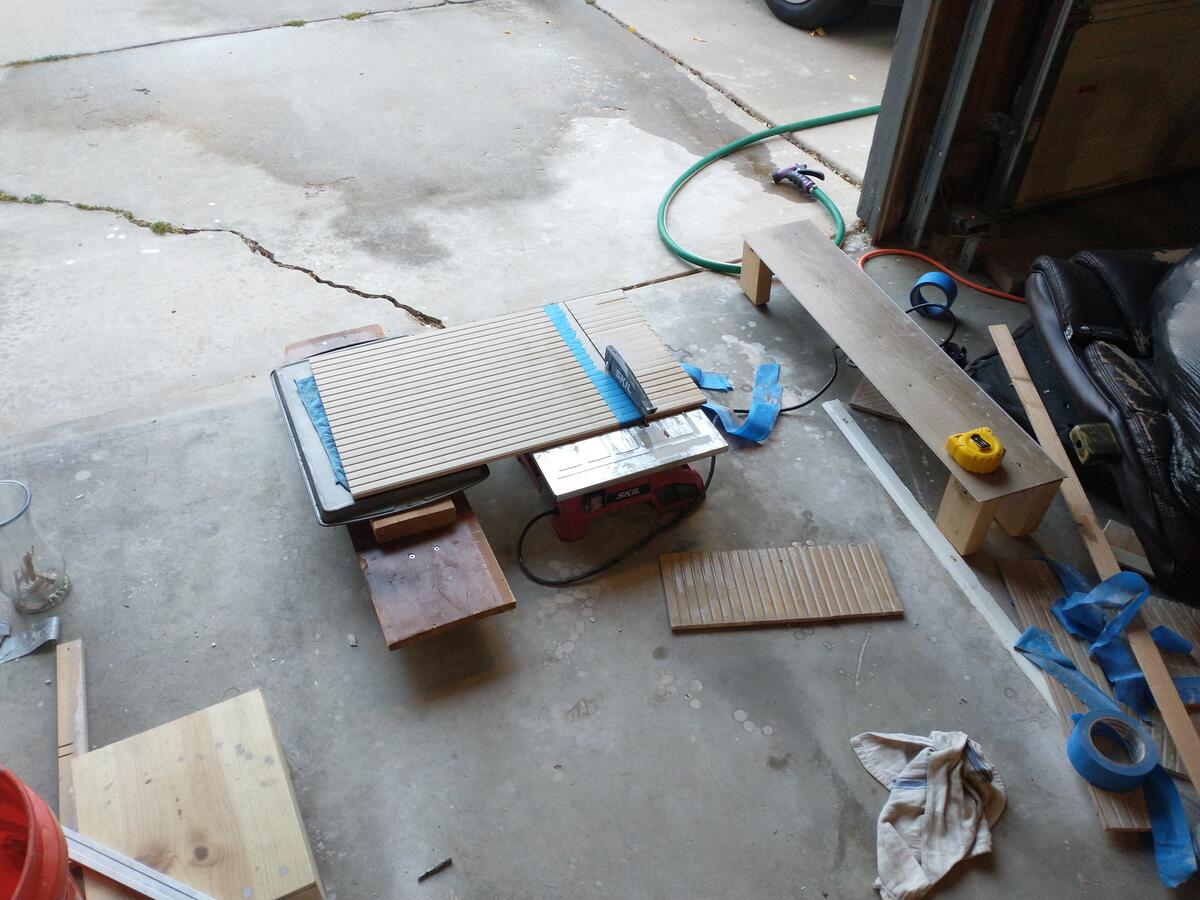
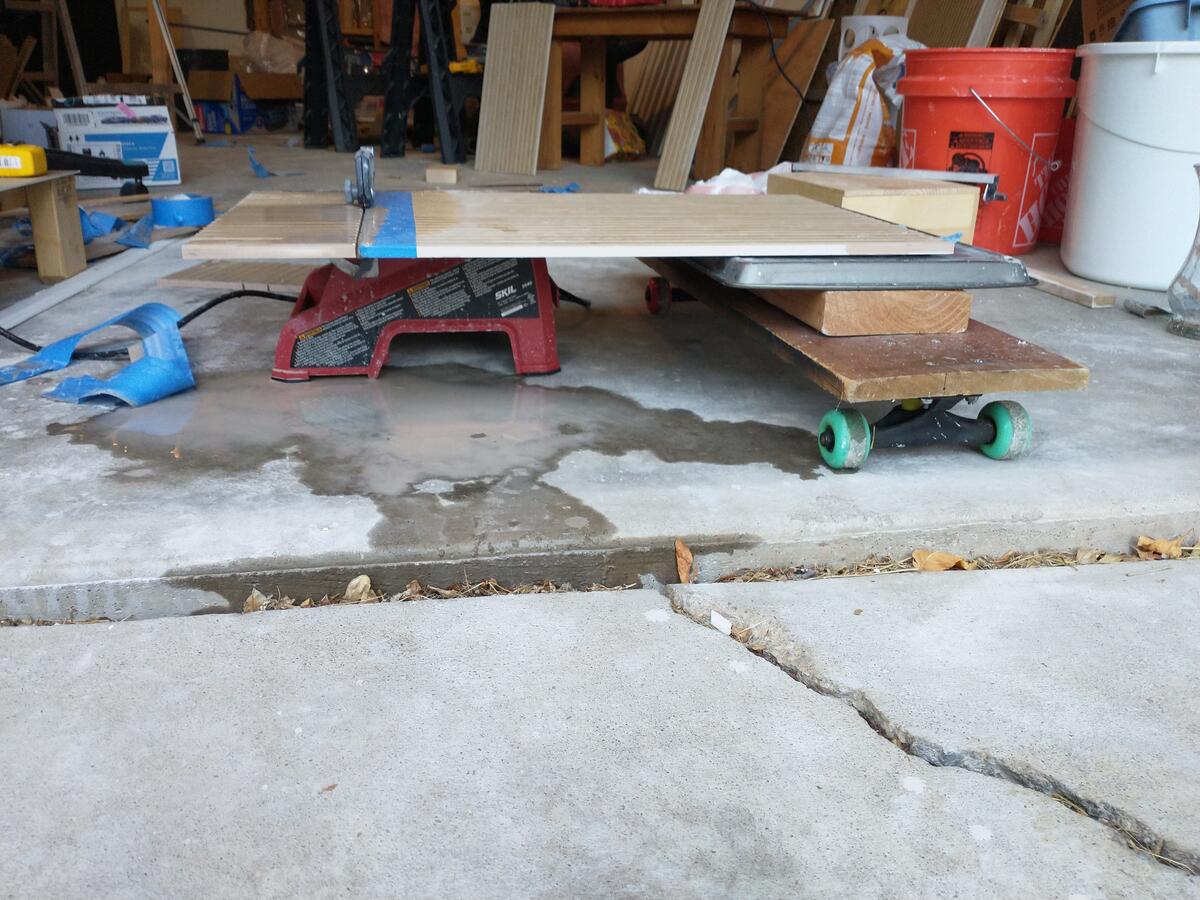
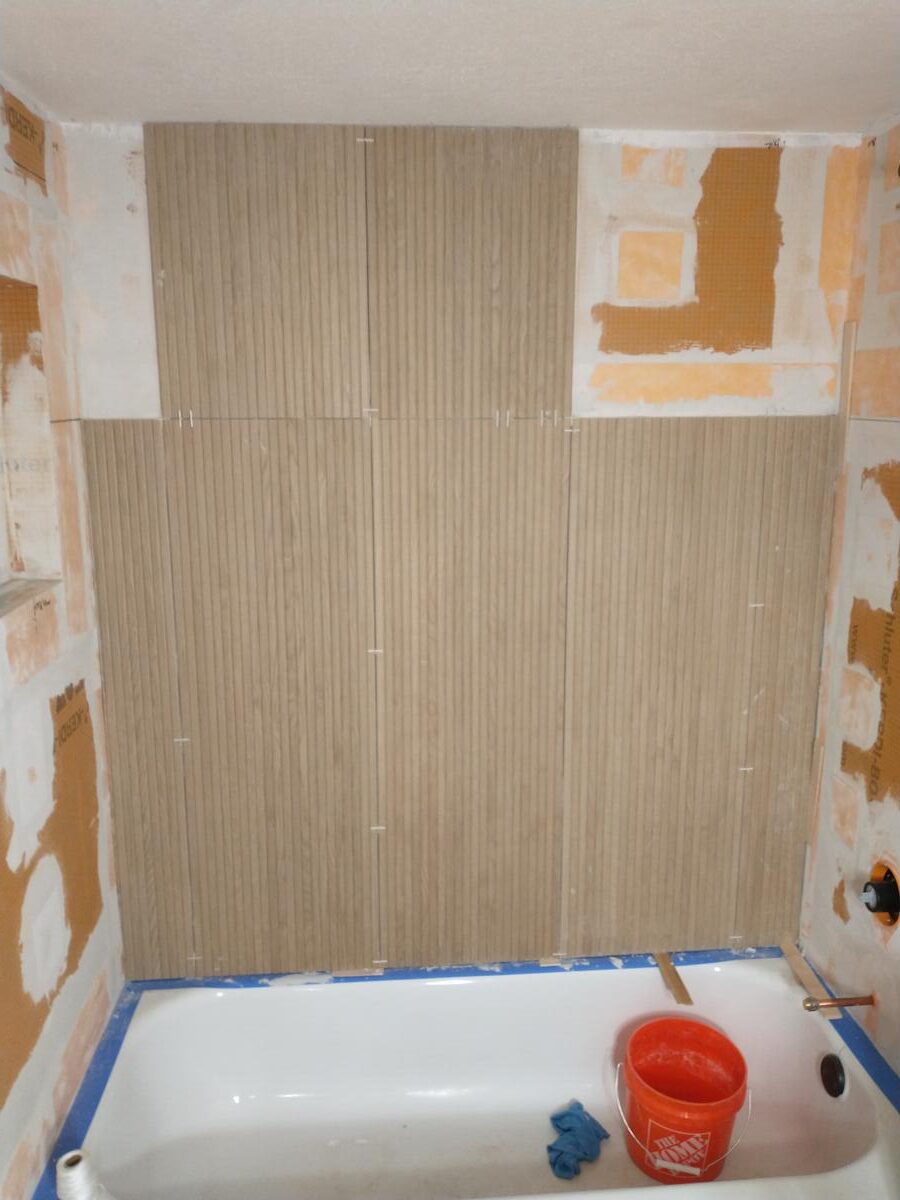
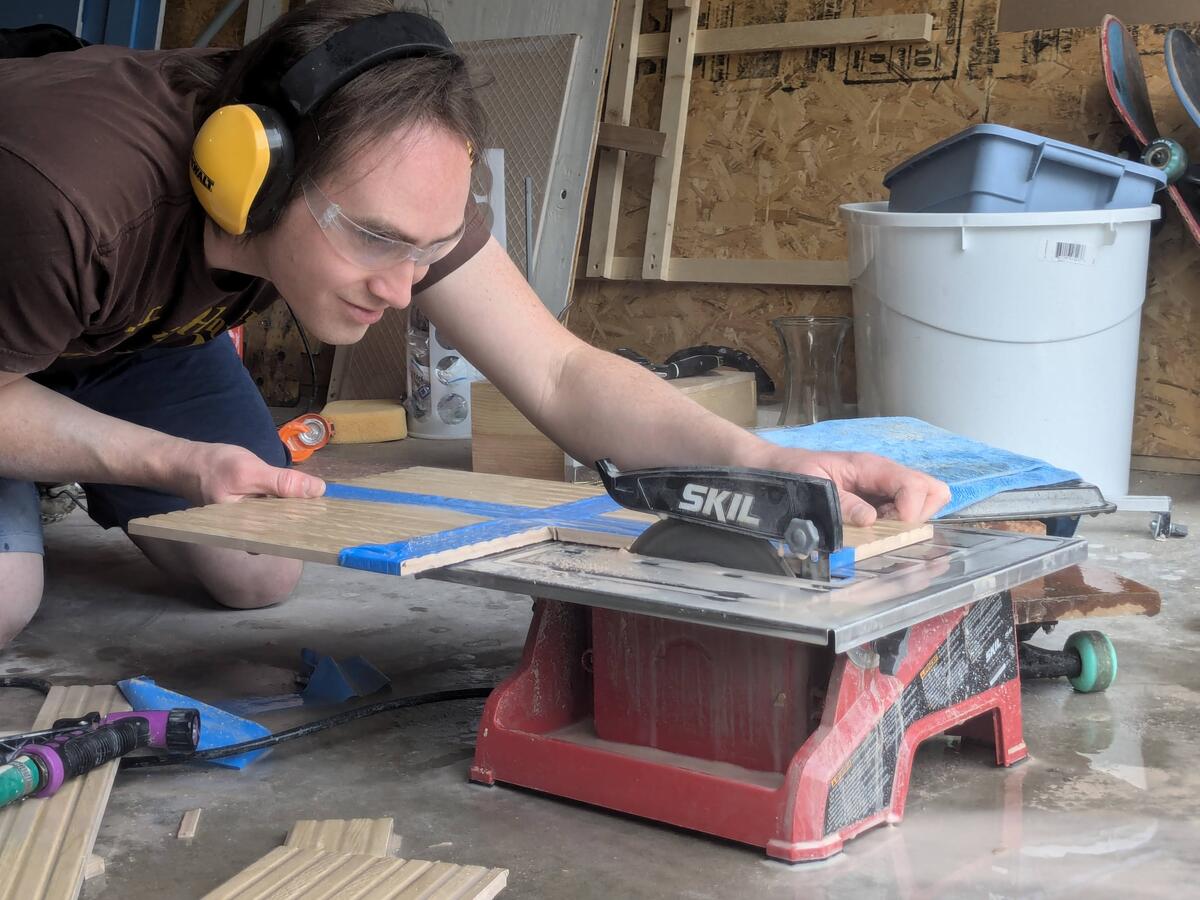
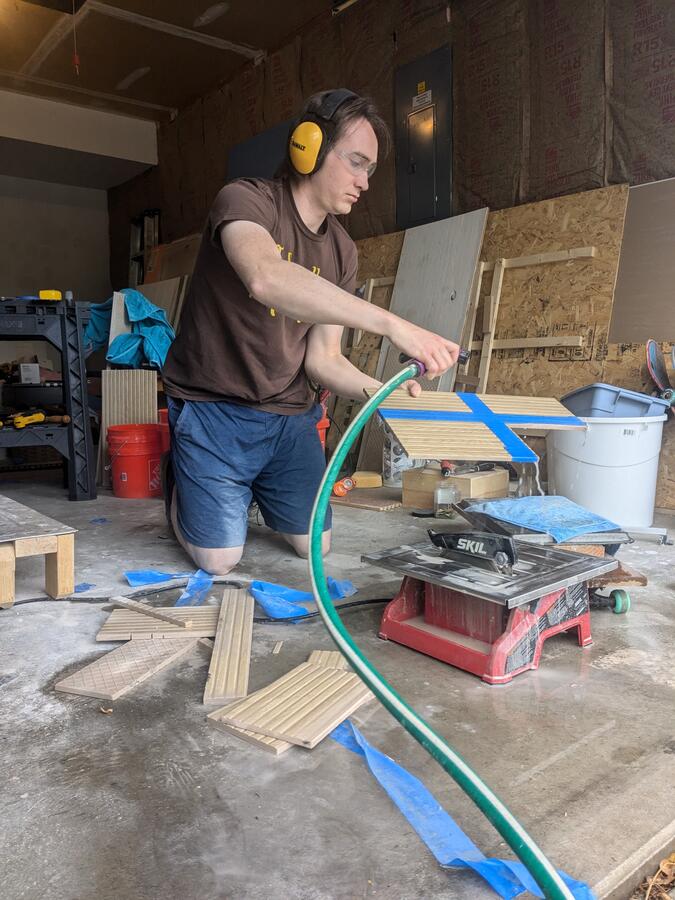
Installing large-format tile, especially when you don’t have the professional equipment, is really hard. It’s a natural fit with Kerdi-Board, because the Kerdi-Board is slightly flexible and the large-format tile gives the wall the right amount of rigidity, but cutting large-format tiles to fit a space correctly is a huge pain. I used a cheap tile saw that I would normally only use for small tile and a complicated process to get all the tiles cut properly. It went pretty well, except for all the little breakdowns when I cut a tile wrong or the time I was tired and dropped a tile in the tub, shattering it and luckily not damaging other tiles or the tub very much. The cutting of the tiles went pretty smoothly after I built a sketchy rolling table out of a garbage skateboard and a cookie sheet to make feeding the tiles into the saw a bit easier.
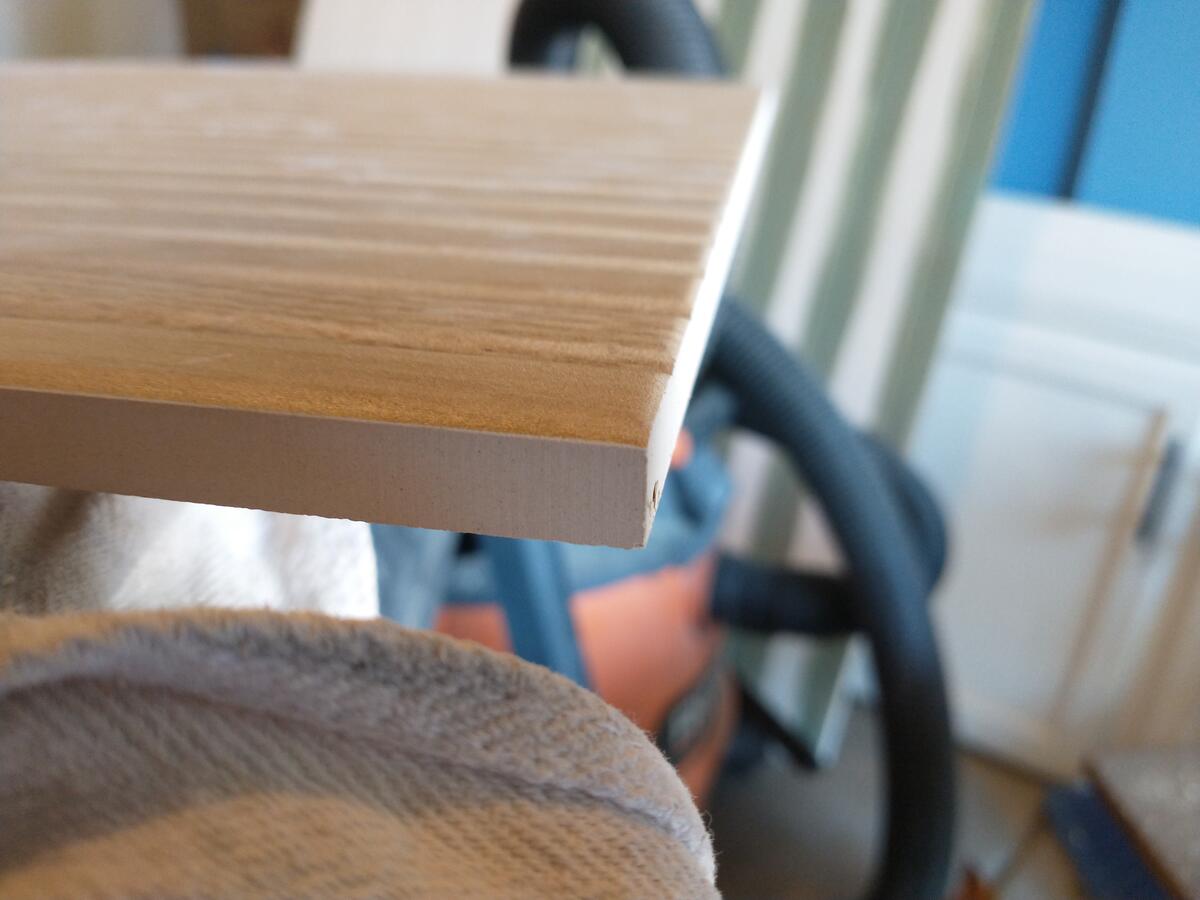
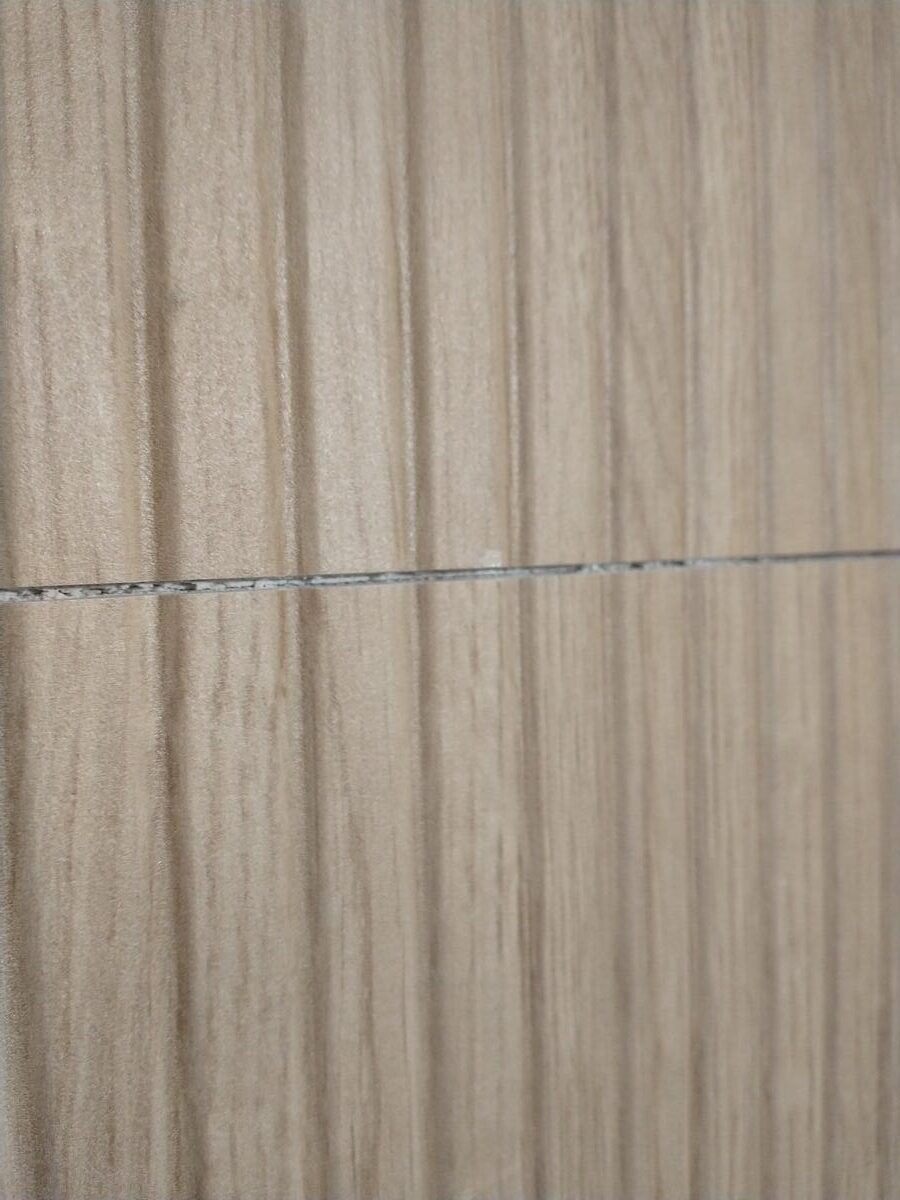
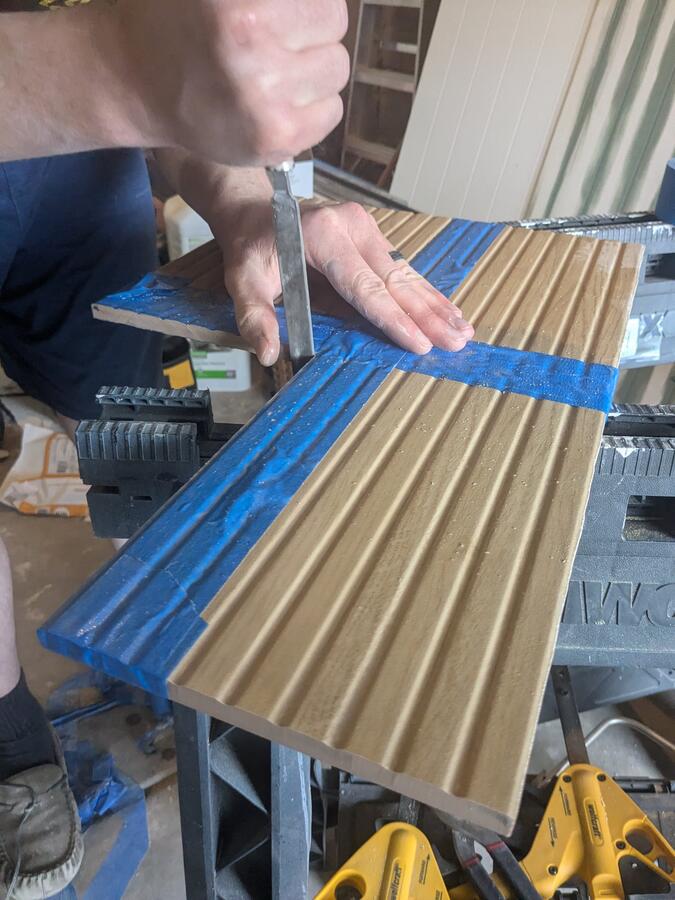
The one thing I didn’t count on was a defect in the tiles themselves. These large format tiles are really pretty, and they have a surface texture like vertically-slatted wood. Unfortunately, something about the manufacturing process and this bumpy texture makes the ends of the little wood bumps extremely weak.
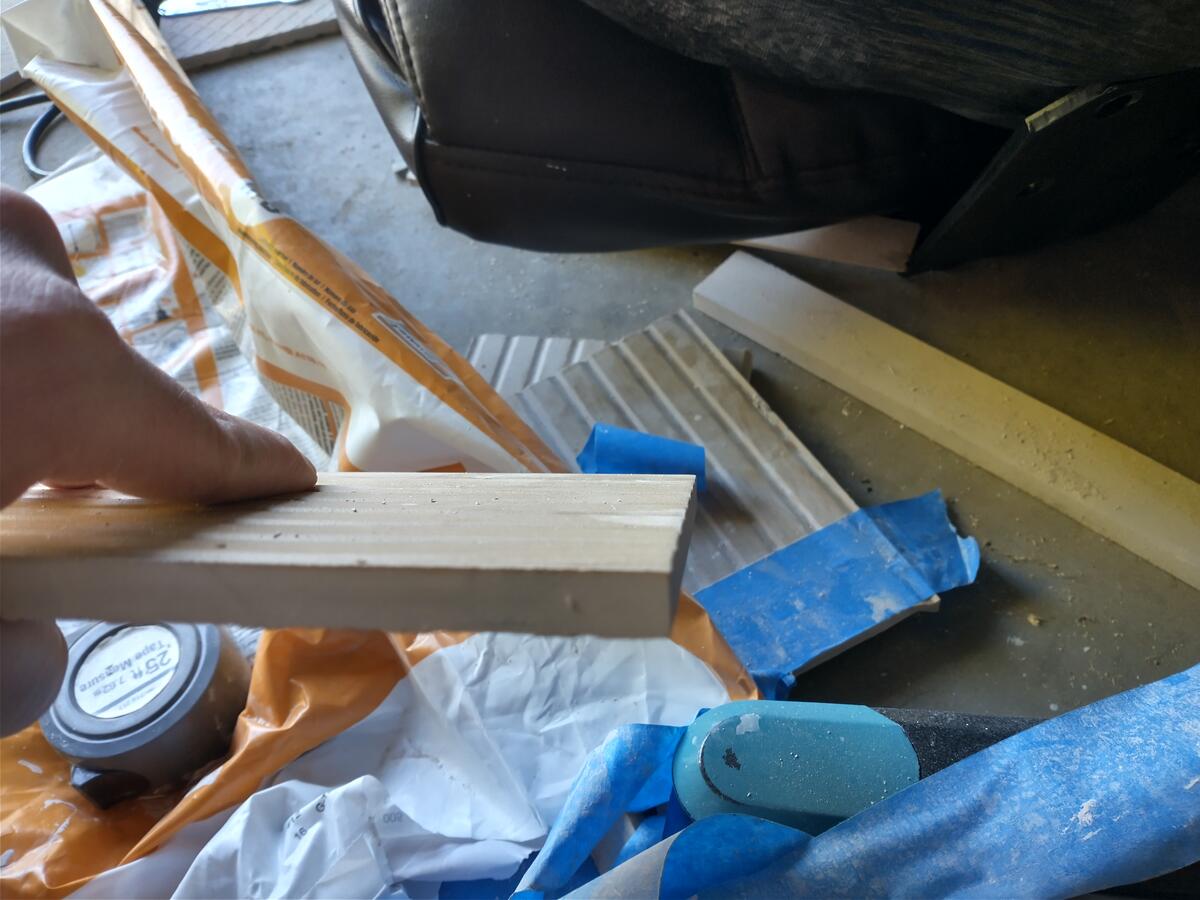
I took this picture to remind me what the edge of the tile should look like. Each of these tiles had one end with a beveled edge, like this, that was durable and a sharp edge that was weak. Once I figured that out, I was able to orient them with the weak edge in a position where it would be hidden behind silicone.
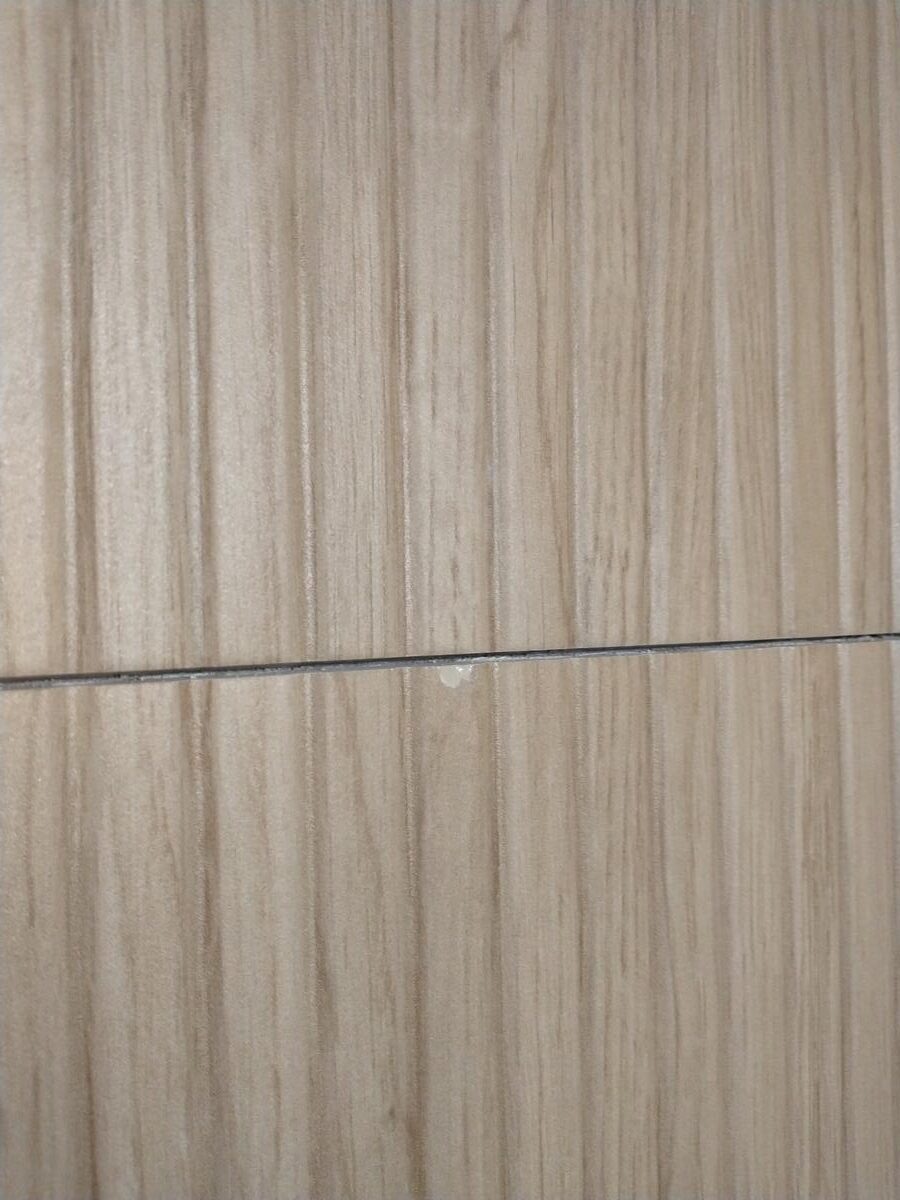
When I was putting the tile in, I rested one piece on the piece below it and caused one chip I didn’t see until the mortar was set. In another place, I placed a tape measure against the edge of a piece of tile that was already installed to measure the length of the tile, and the metal end of the tape measure chipped the tile. In a third place, I tried to use a putty knife to break up a piece of mortar that had dripped down between the tile and the tub, because there should be a little air gap there, and I accidentally chipped the edge with the putty knife.

Each one of these chips was very disheartening, and my wife is a saint for putting up with my tantrum each time I damaged the tile. I love how these tiles look, but for my own mental health I will never use them ever again.
The order of operations for tiling was split across 4 days:
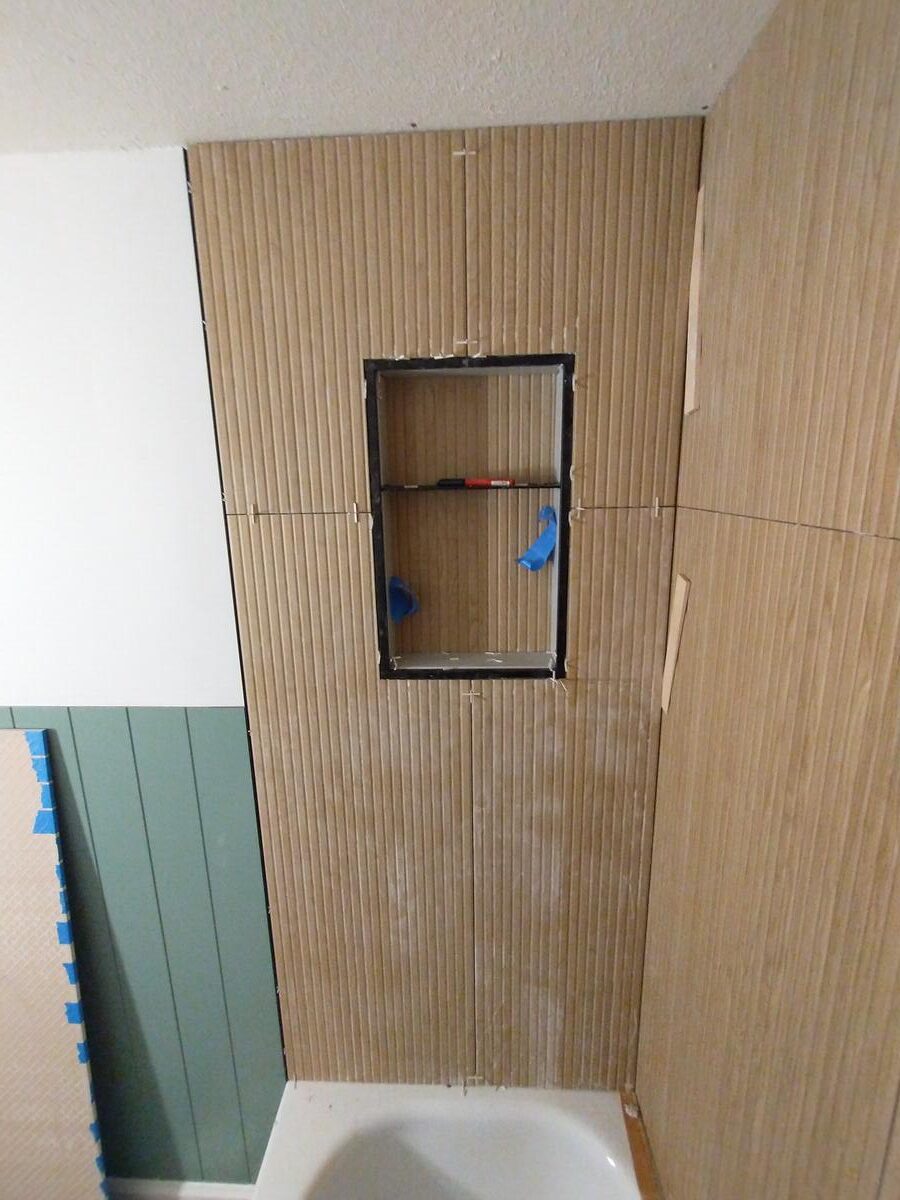
- Day 1: tile the bottom of the big wall and the back surface of the nook
- Day 2: tile the rest of the big wall and the rest of the inside of the nook
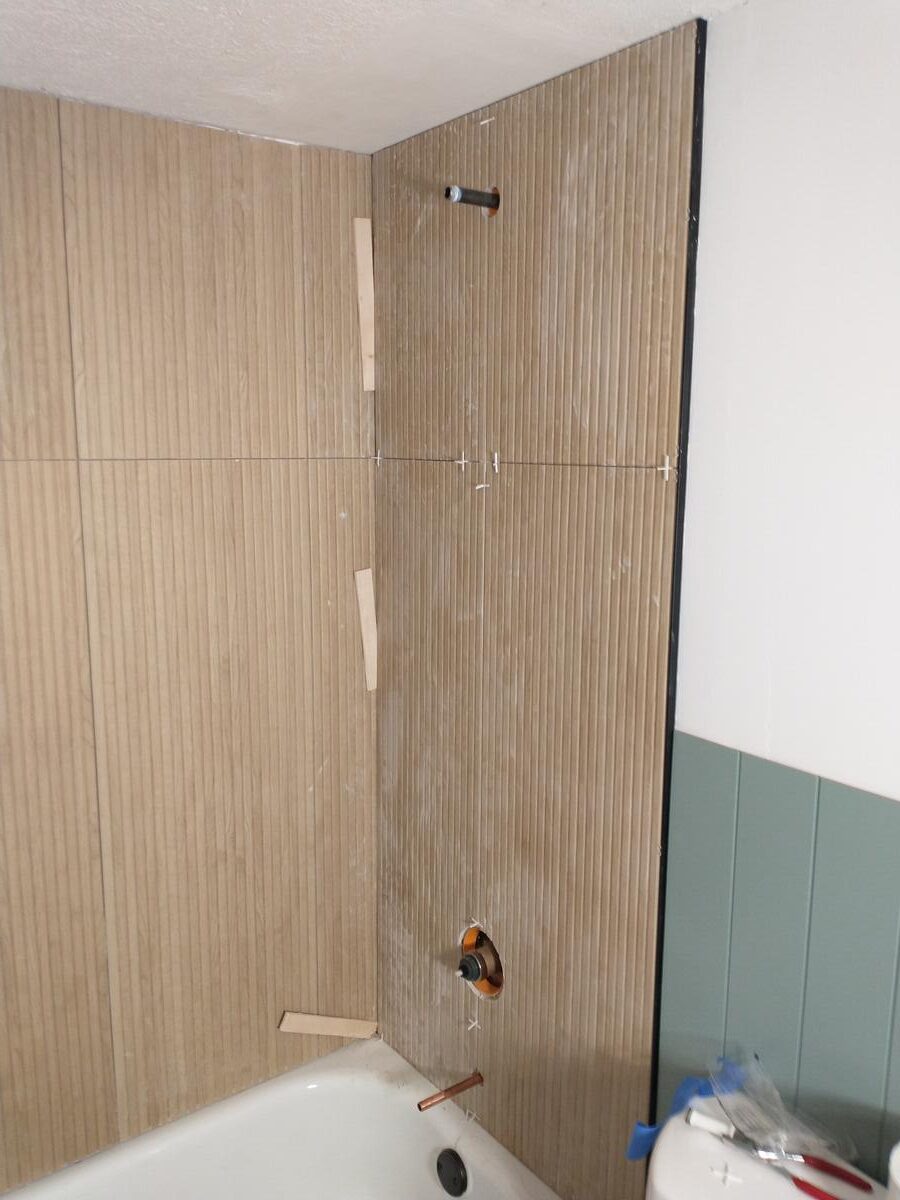
- Day 3: tile one end of the tub, including the edging
- Day 4: tile the final end of the tub
I broke those 4 days up over a couple weeks and eventually got it all done.
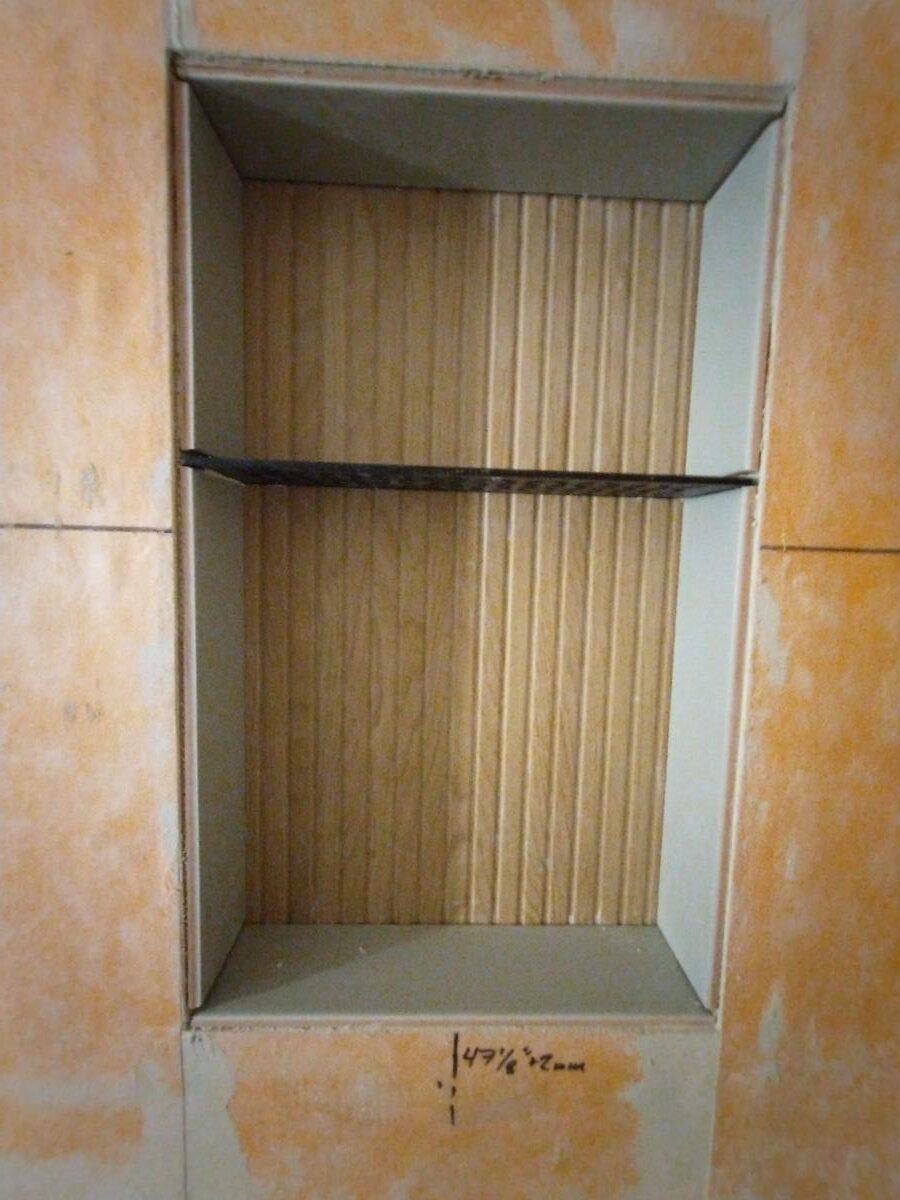
In the nook, I used one of these Schluter niche shelves designed just for this purpose. At over $100, they’re very expensive, especially considering they seem to be 1/8″ aluminum water-jet cut into this shape and then powder-coated, but they’re super easy to use and they save you from quite a bit of work. It just gets shoved in between the tiles and into the mortar, and the mortar and grout will hold it in place.
Cutting the tile to fit around the nook was especially annoying, because it had to be freehanded on my baby tile saw. I broke one tile while doing this (the one I dropped in the tub), but the rest went very well. I basically cut a smaller section out of the corner, then came back for the finishing cut. I left a little piece on the inside corner and filed it down so that the inside corners would be square.
At the last minute, I decided to flip the bottom edge piece of the niche trim. I just decided it looked better with the rounded edges on the top, rather than the outside of the box, because the trim could be put a big tighter together.
Grouting this tile is also super annoying, because you can’t wipe grout across it at all. I started trying to do it free-hand, and then gave up and taped off all of the seams so that I couldn’t float the grout too far from the tile edges. I used unsanded unmodified grout for this because I knew the cleanup would be a huge pain, and I was right. If I had tried to use cementitious grout, I would have wound up with it stuck in the grooves of the tile and no way to get it out. Normal unsanded grout is much weaker, but it’s simple and easy to use, and you can continue to clean it even up to a couple hours after it goes on. We used some grout we already had from the kitchen backsplash in the niche, but we used grout and caulk matched to the color of the tile grooves everywhere else.
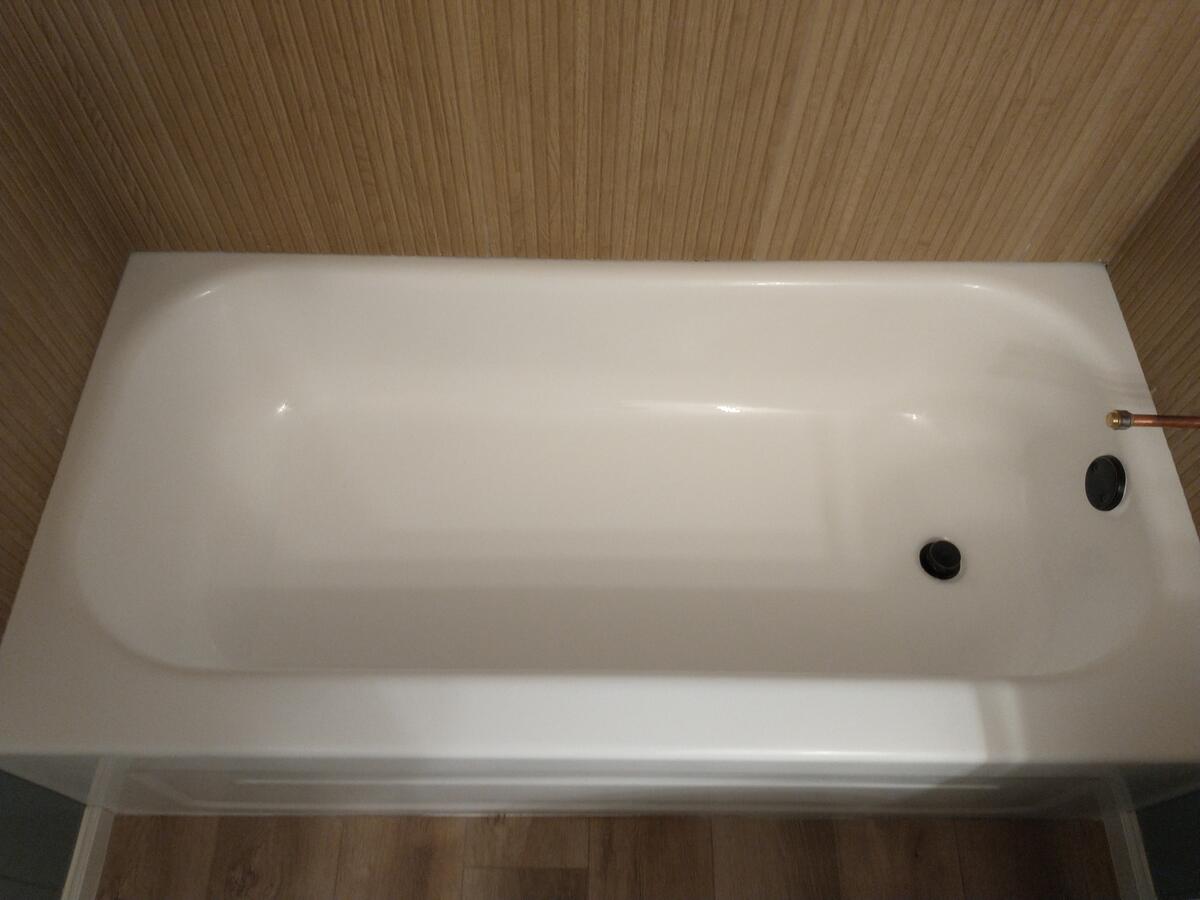
Tub refinishing
With the tiling all done and the drain in place, we hired a company called Miracle Method to refinish the bathtub. The tub had 40 years worth of scratches and chips, but refinishing is still way more economical than replacing. They came out and turned the room into a paint booth by sealing it with plastic tarps and filtering the air to remove dust. Then they smoothed the existing surface, sprayed on a new finish, and polished it. They came back the next day to roll on a non-slip coating in the bottom. It cost about $800, and it looks brand new.
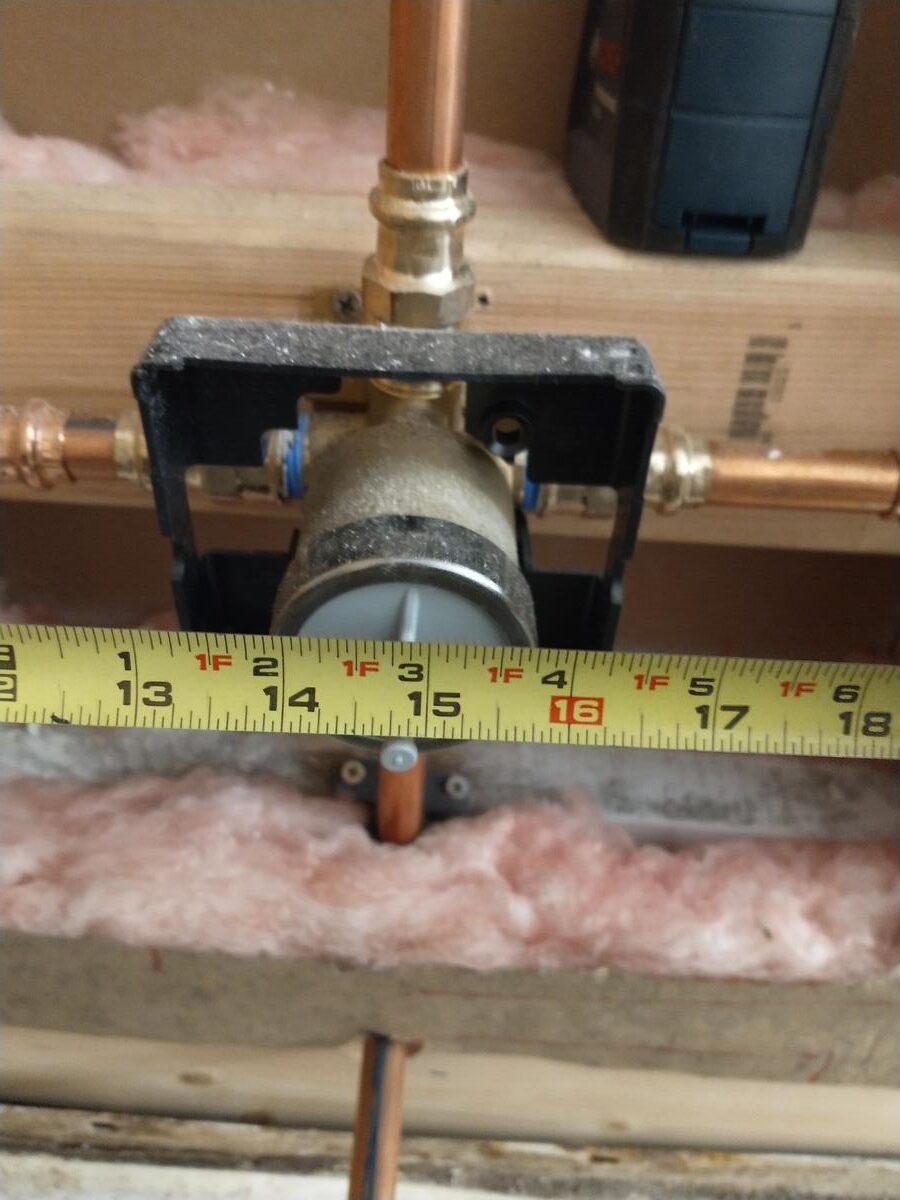
Plumbing repair
As soon as the caulk was dry, I put in the shower head pipe and installed the shower valve in order to get the tub ready for the bathtub refinishing. I had made a couple mistakes before installing the tile where I thought the valve blank was cutting off the flow of water when it doesn’t work that way. I sprayed the tile backer with water, and that delayed the project by one day while I waited for the Kerdi-Board to dry out. I can take some comfort that I am not the only one who made a plumbing mistake with the valve, though.
We hired a plumber to install the new shower valve and the tub drain. This kind of work is really specialized, so I often prefer to hire a professional for it.
After installing the shower valve cartridge, I was excited to turn the water on for the first time. A small trickle came out of the tub spout, so I leaned in closer to look at it. Then a large flow came out of the shower and hit me in the head.
I was confused, and couldn’t figure out what happened at first. My wife googled it and pointed out that the valve might have been installed upside-down, and I said “there’s no way, that would be too stupid.” Sure enough, when I knelt down in the tub I saw that the “UP” label on the valve body was pointed down. The valve body has a restriction in the pipe going to the shower head that keeps the shower head from always spraying water. With the body flipped around, that restriction prevented water from coming out of the tub spout quickly, and made it so the shower head was always on.
The plumber came back out to flip it around, which he had to do through the other side of this wall in the garage. I wound up being disappointed in the work, not just because the valve was put in upside-down, but also because of the lack of care taken with everything on the way to the plumbing. He did not remove the insulation that I had just put in, slightly burned/melted a small part of the back of the Kerdi-Board, didn’t use the drip pan that I offered him, spilled a lot of water in the wall while he was fixing it, shoved all of the wet insulation out of his way into a ball (ruining it), and didn’t even bring the access panel that he had told me he would install.
All that added at least 5 days to the project, while we waited for the tub finish to cure so the plumber wouldn’t scuff it with shoes or parts, while we waited for them to do the work, while I dried the wall out in the winter any time the outdoor temperature was over freezing, and while I replaced the drywall.
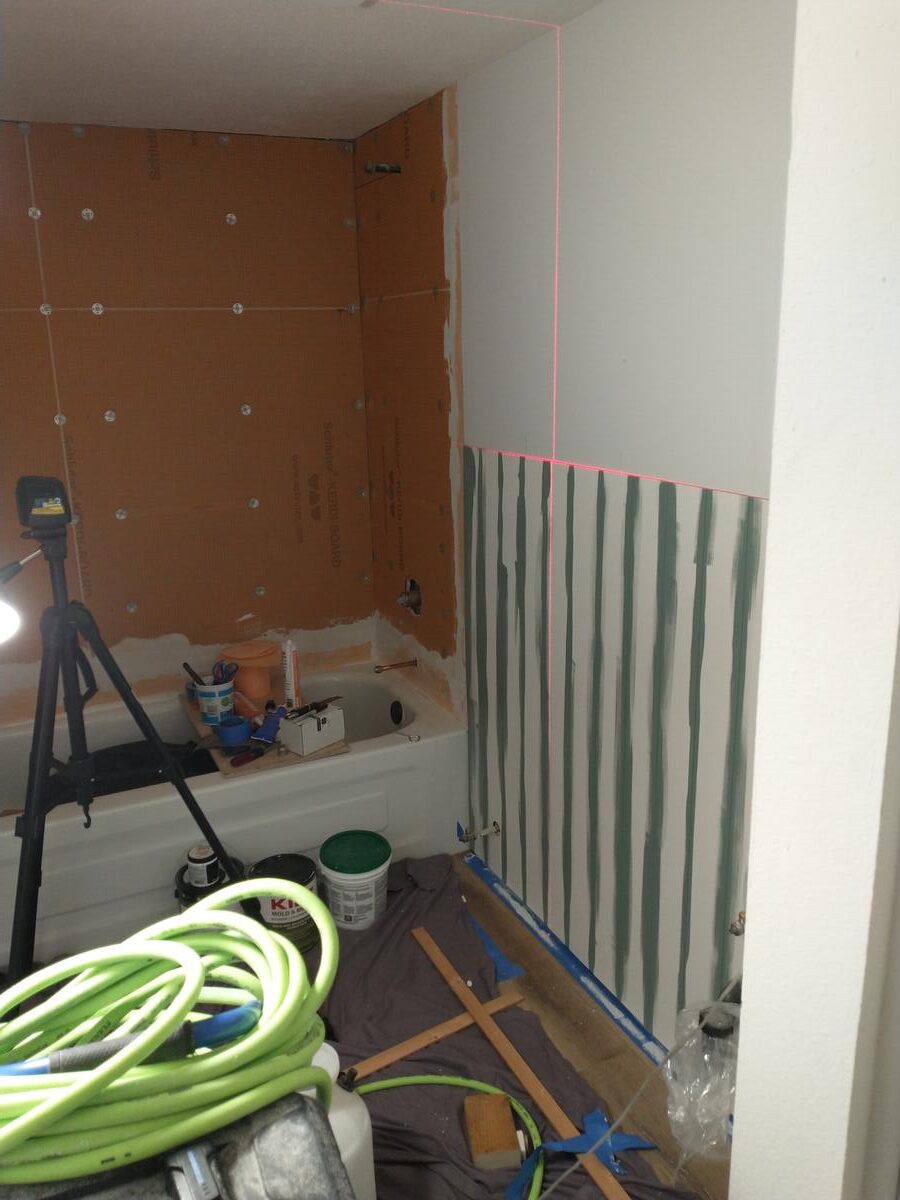
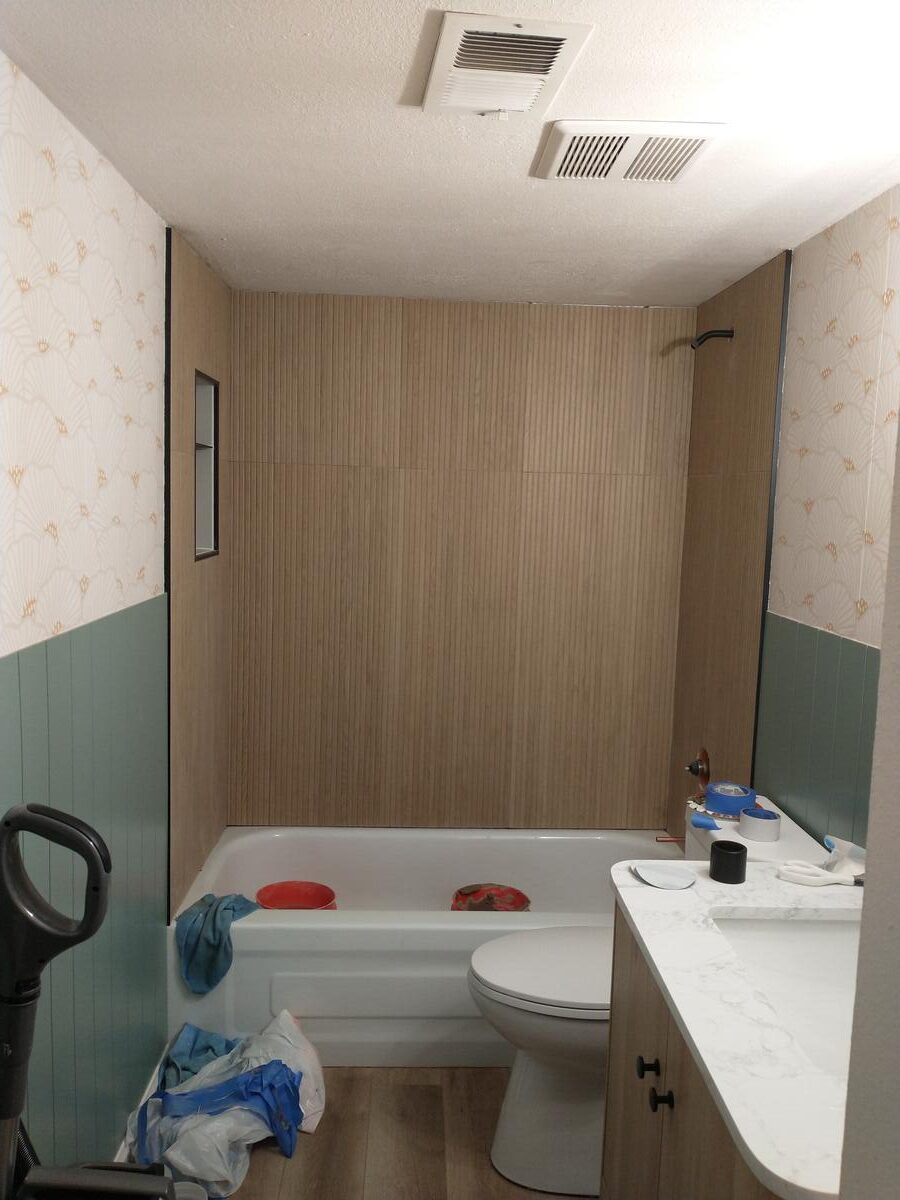
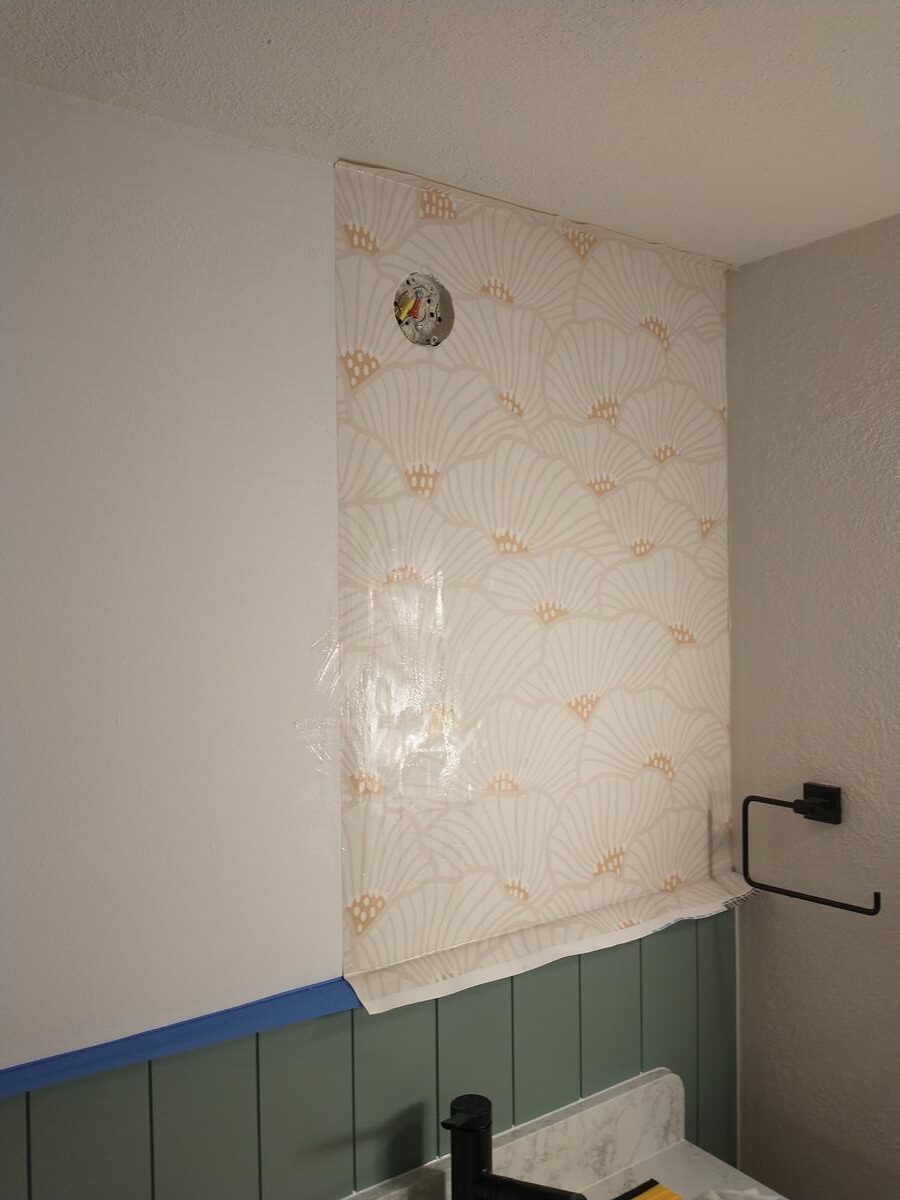
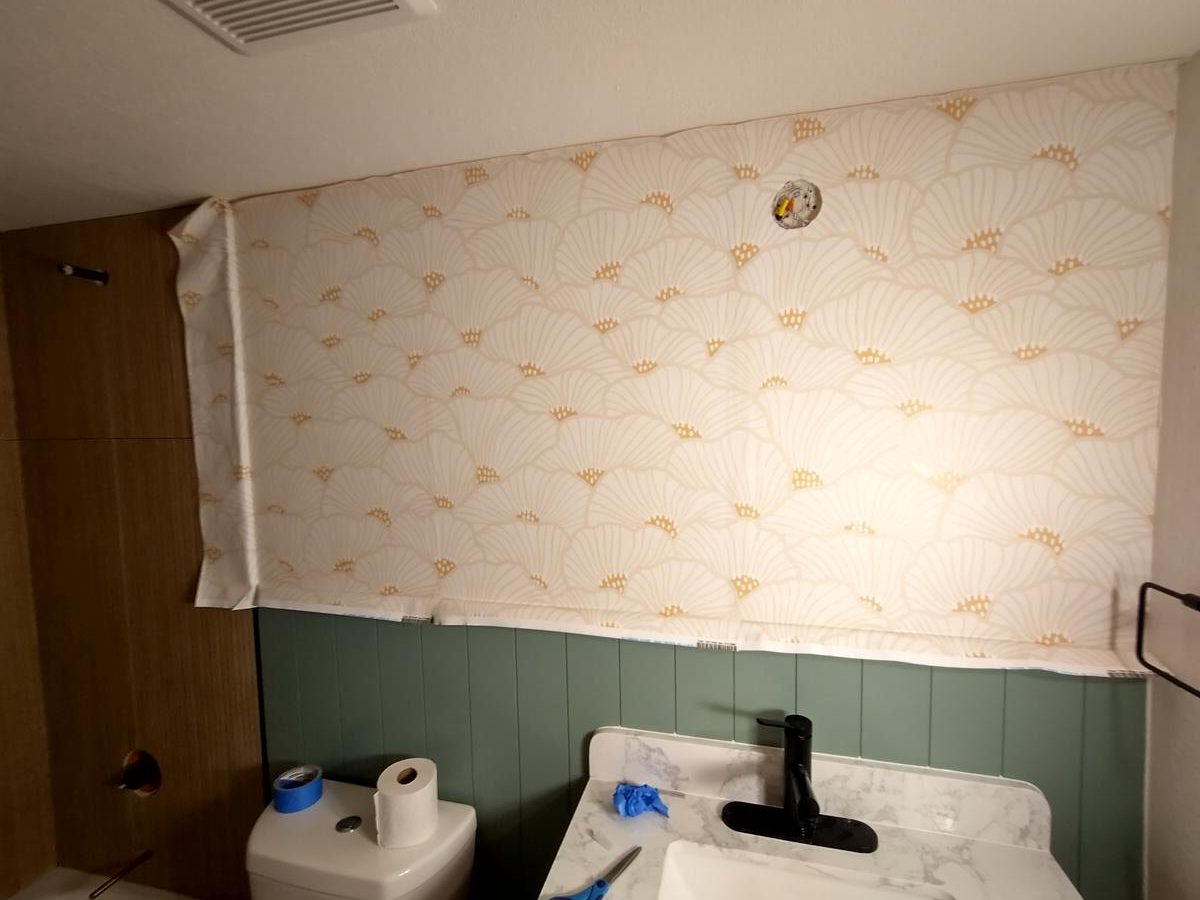
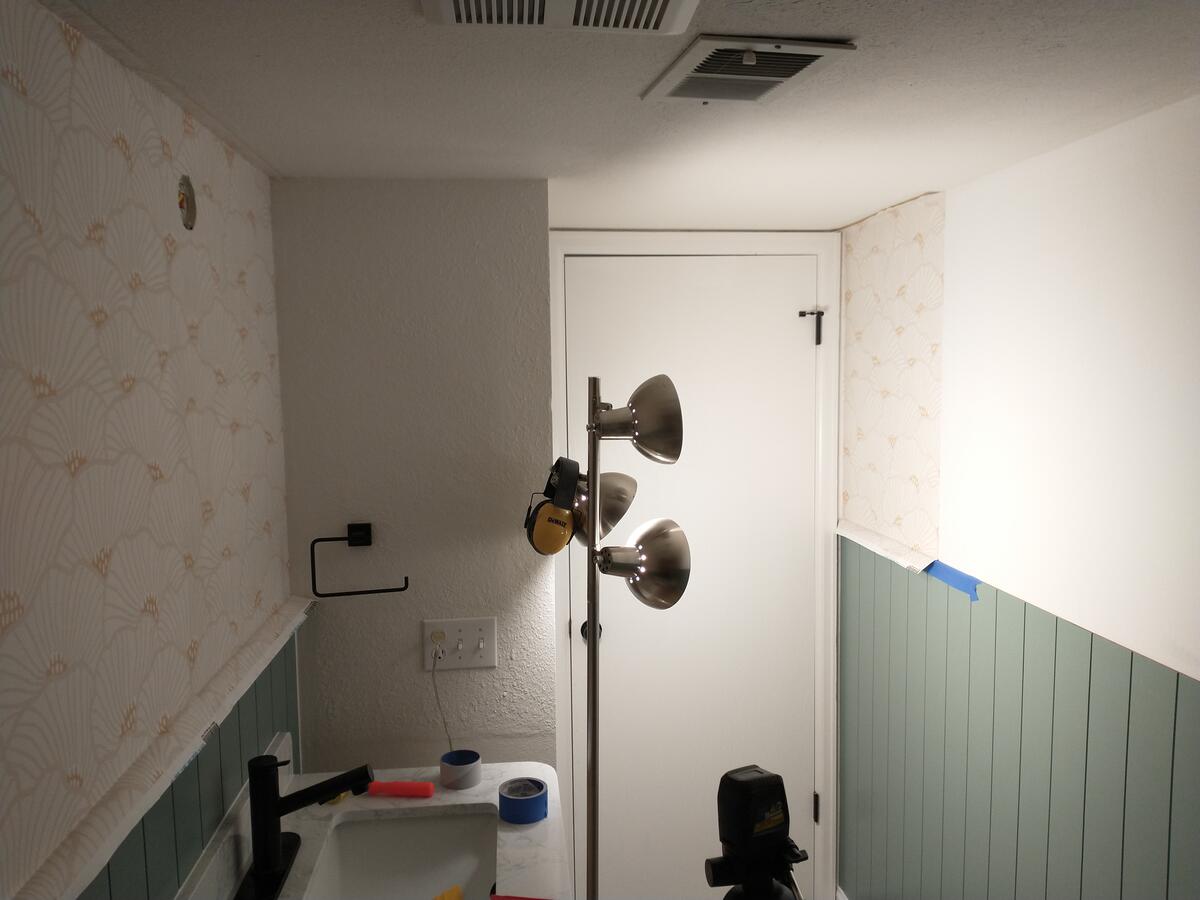
Wallpaper
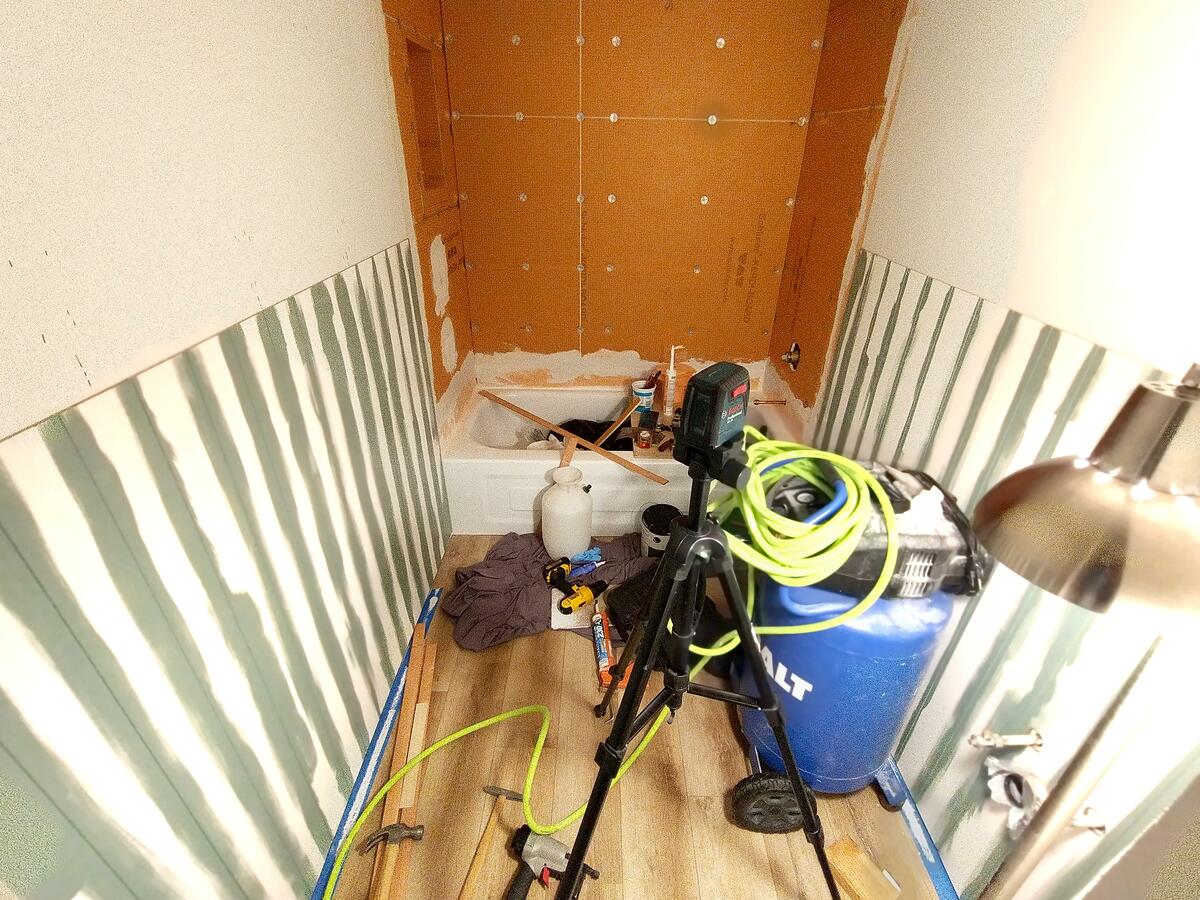
With the plumbing finished and tile installed, the bathroom was actually functional, and I was able to take my time putting in the wallpaper. This was definitely a 2-person job. I put up the wallpaper and my wife went ahead of me with the laser level to guide the edge of the new sheets. She also watched for any bubbles that I missed as I smoothed it out.
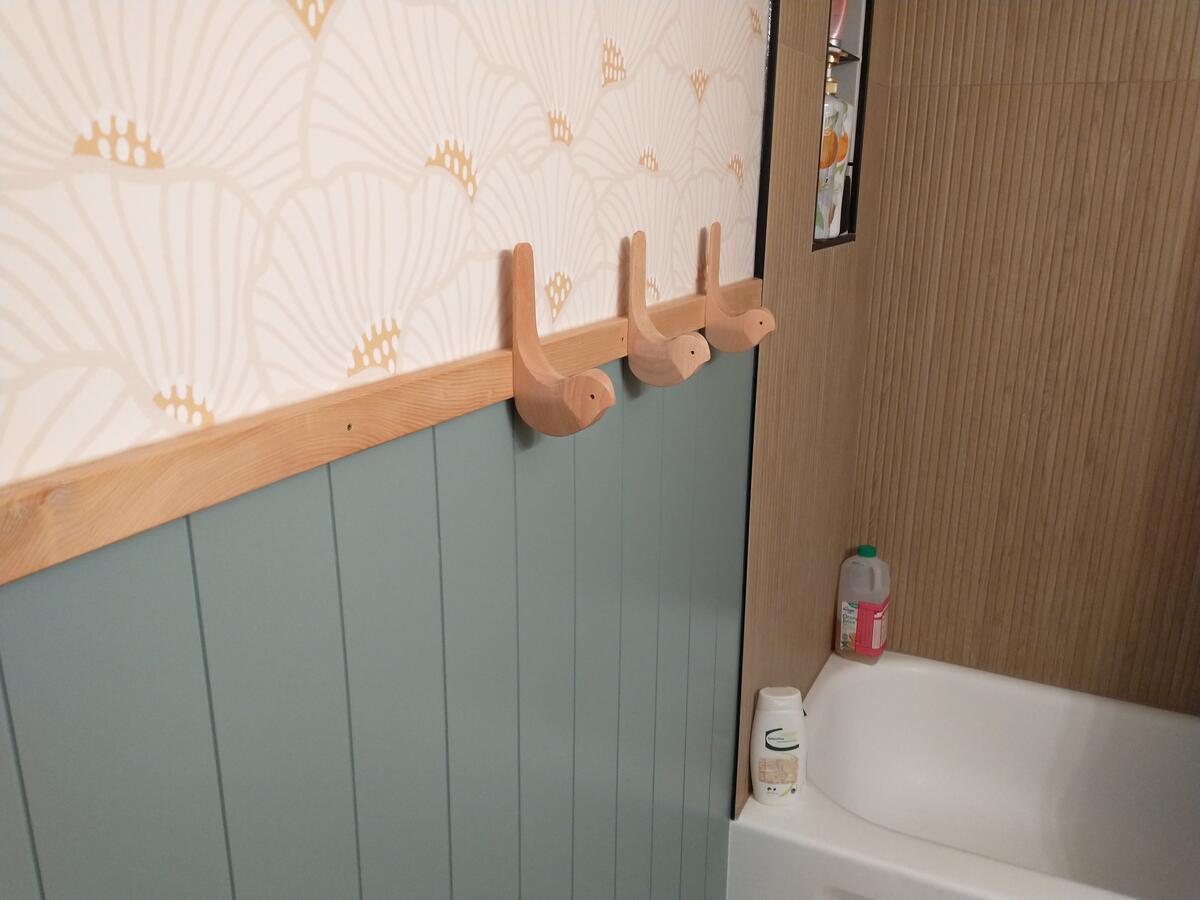
For a long time I put off installing a railing on top of the shiplap, and we eventually decided just to use 1×2 dimensional cedar lumber. I did a test batch of small samples in various finishes, and we decided to seal them with the Minwax warm flat finish polyurethane. After they were dry, I used finishing screws to fasten them to the walls and sealed the wall seam with clear silicone.
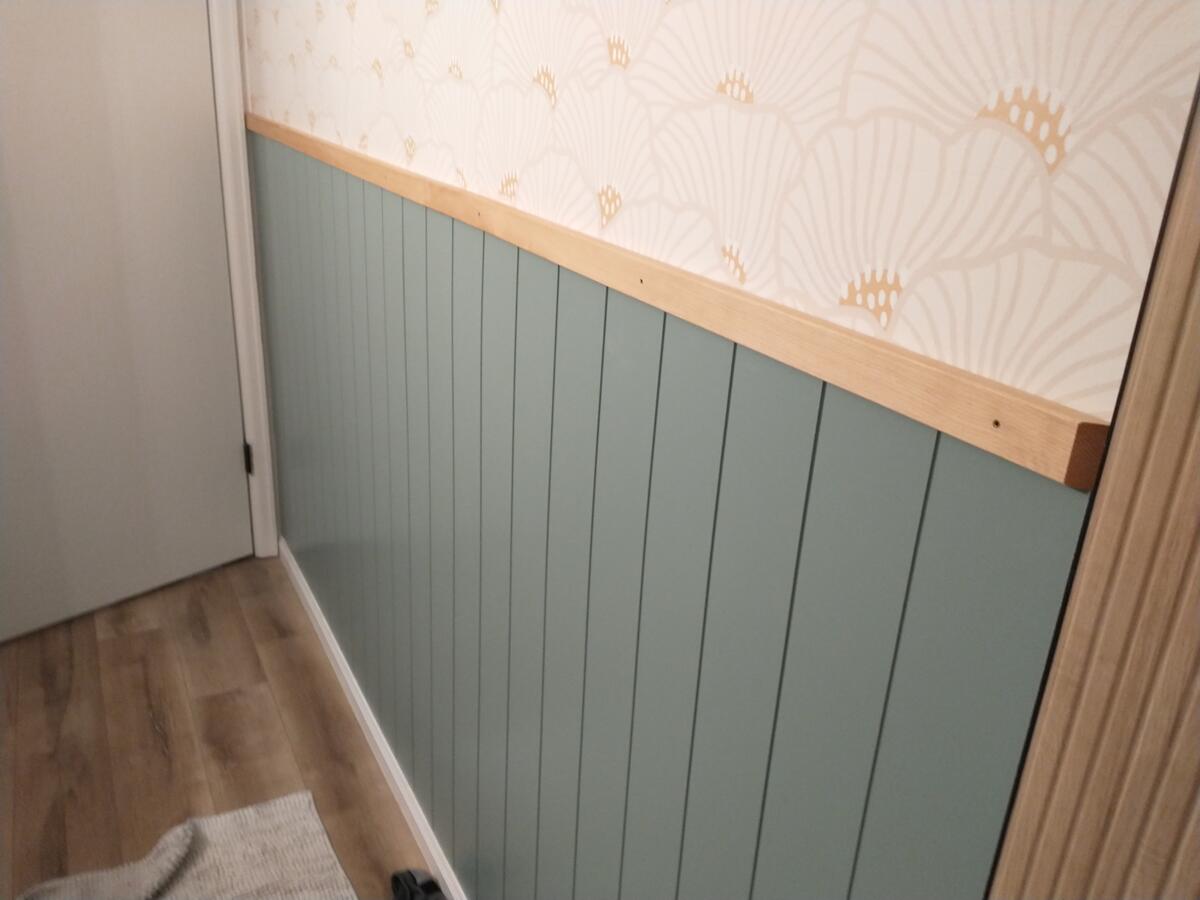
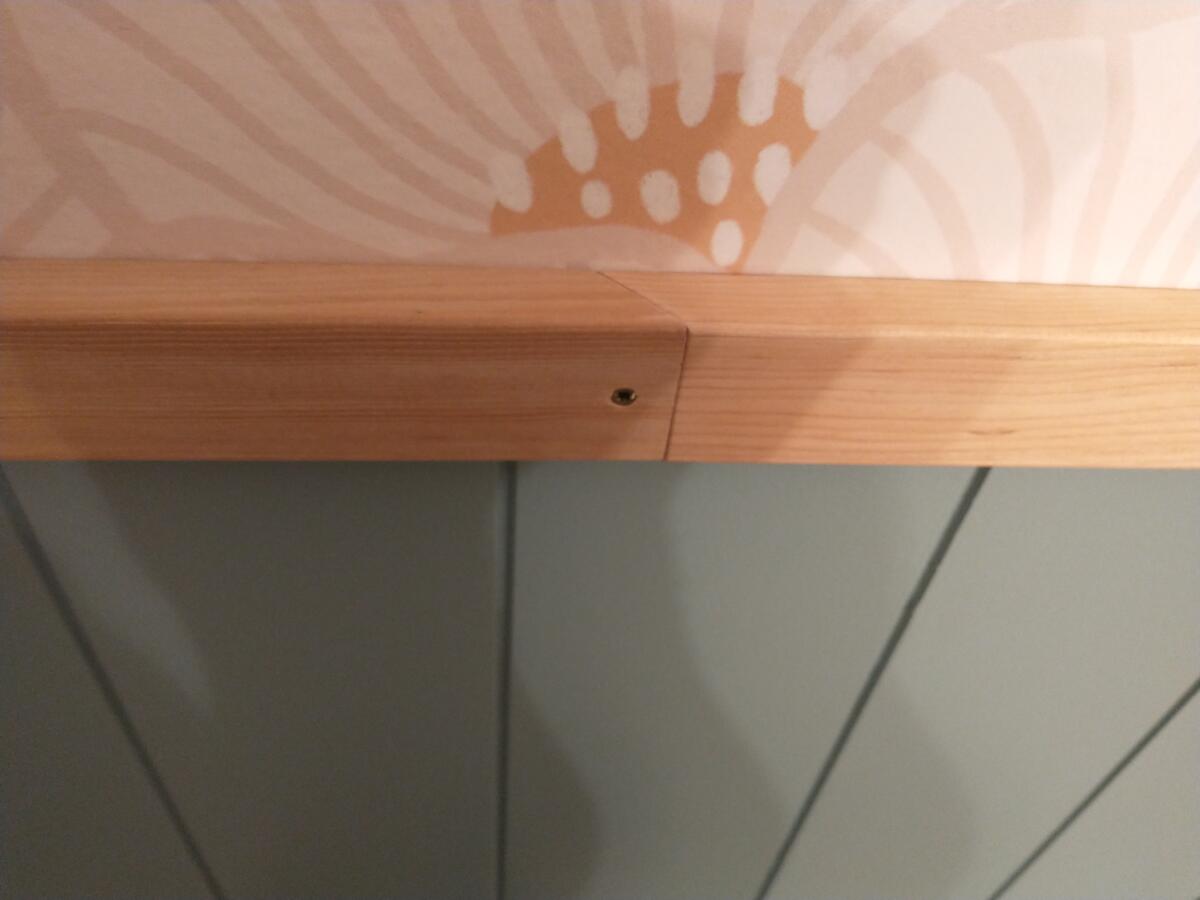
Finishing screws might seem like a weird choice because they are much more visible than if I had used a nail gun. The benefit is that they provide significantly more fastening strength than nails, which means I can actually use this railing as a mounting point for whatever I want. The first thing to get mounted to the railing was a set of little birdie towel hooks.
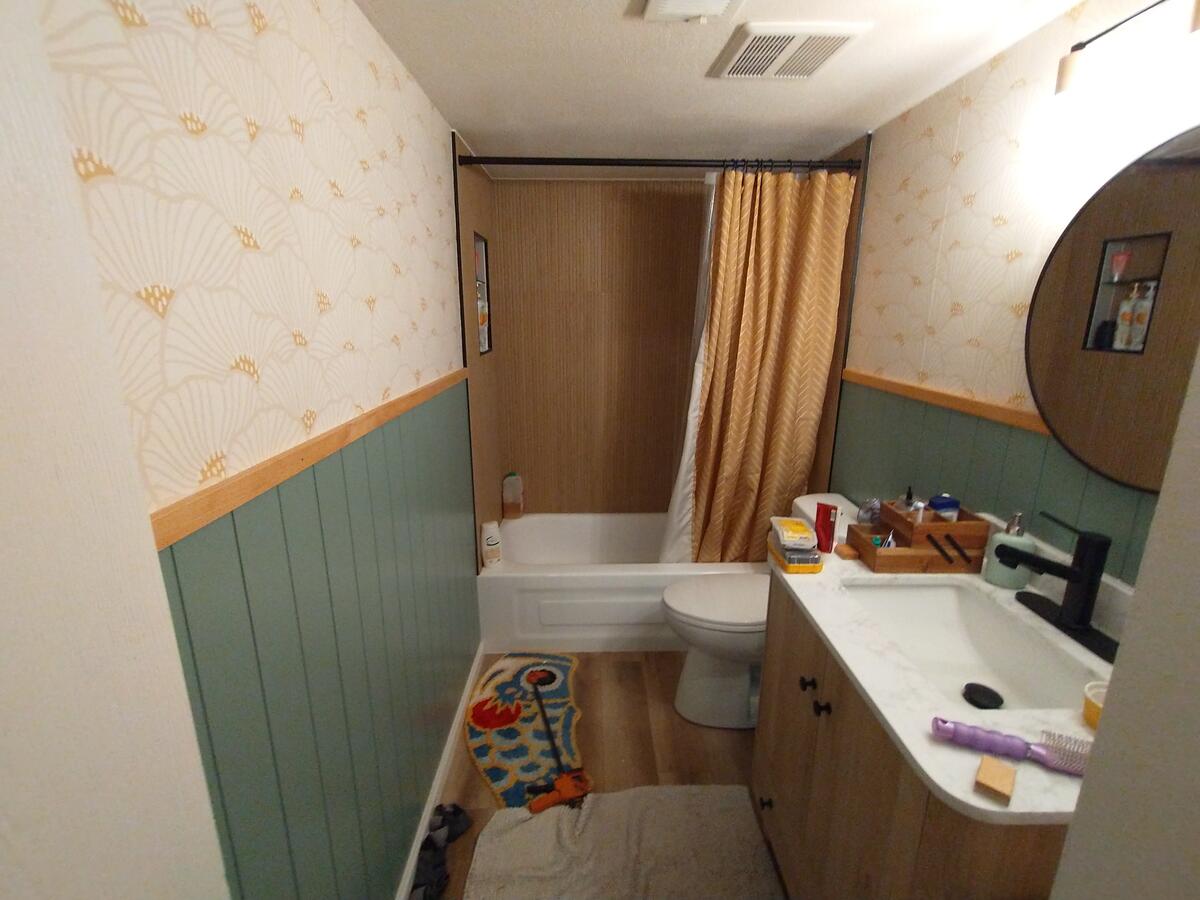
I’m really proud of this bathroom project as a whole. It was definitely a ton of work, and an emotional rollercoaster, but I think it turned out very well.