
I’m pretty sure the people who flipped our house installed new doors that matched the white and black color scheme they were going for. The hardware is cheap, but the real issue that we have had is that the doors are not properly aligned.
Around the door frame, the stop moulding is the strip of wood halfway through the door frame that the door hits when you close it, causing it to stop in the closed position. Our doors were all mounted too close to the stop moulding, and they would slightly hit the stop when closing them. This was fine for the purpose of flipping the house, because it’s not like people go to open houses and slam the doors. After a few months, though, we started to notice the damage. When the door hits the surface of the stop moulding, a lot of leveraged force is applied to the hinge plate, maybe enough to rip it out of the wall. If the door just rubs against the moulding, the paint on the surface of the door will get ripped off. These issues are especially bad on these doors because they are mounted with only two hinges instead of three, which means there is more distance between fixed points where warping in the door can cause it to interfere with the stop moulding.
We noticed a lot of damage to our hinges that was making the doors feel loose, and we noticed that the paint was getting rubbed off the inner corners before we identified the issue. I tried to fix it with tiny slivers of wood shims, but they kept falling out over time. Eventually I decided to just 3D print a solution.
Basically, I wanted to scoot the hinges just 1mm farther away from the door stop moulding. The paint that is being scuffed off is probably 0.1mm thick, so 1mm more space would be plenty of clearance for it. For a move of 1mm, the screws don’t need to be re-drilled or anything, they will just get pushed into place when they’re tightened. I searched on Thangs for a ready-made solution but didn’t find anything, so I decided to design my own.
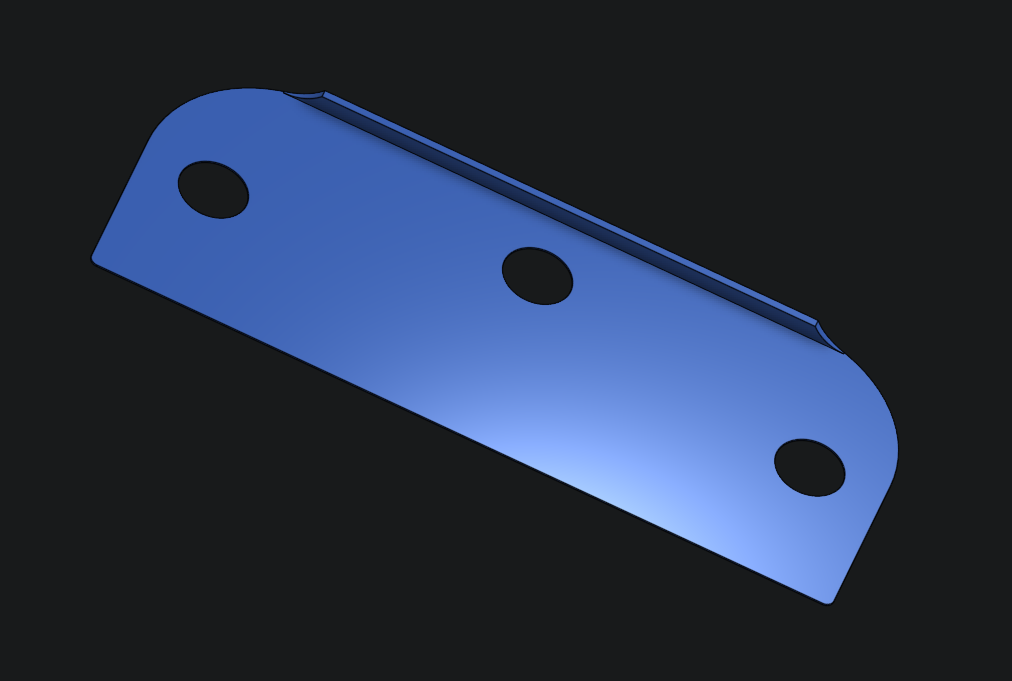
These tiny little door hinge shims have a 2mm-tall, 1mm-thick lip that the door hings will butt up against, spacing it 1mm further away from the door stop moulding. The big flat part is 0.2mm thick, which should be 1 layer for most 3D printers, and about the thickness of 1 or 2 pieces of printer paper. That shouldn’t be thick enough to ruin the horizontal alignment of the door, but the big plate makes it easy to print and durable. I sized it so that it sticks out just a little bit beyond the door jamb, so you can push it up and down with your finger if you need to while you are installing it.
Each of these took about 11 minutes to print and cost about 3 cents, including electricity. I went through a few iterations before I got to this one with the rounded corners and everything.
As usual, this design is free, as in both speech and beer, and you can find it and fork it on Onshape here.
To install them, just have a helper hold the door, then unscrew one hinge, tuck the shim into place, and put the screws back in. Easy as lyin’.
These pictures of this hinge show two screws that had to be extra-long just to reach wood that wasn’t already stripped out, which is what happened when the door hit the top of the stop moulding and the leverage just yanked the screws straight out.
Now that the shims are in place on both of the hinges of this door, you can see the nice 1mm of clearance the door has when it closes.
Now I just have to fix all the spots on the doors where the paint is messed up.
If you want to grab this design and modify it, like to have a different thickness of spacing, you can find it on Onshape here. It’s also posted on Thangs here. If you have the opposite problem, where the hinge is mounted too far away from the door stop moulding, I bet you could use the same shim but put it on the door side of the hinge instead to push the door closer to the stop moulding. I might update that Onshape project with other door hinge shims, like for different screw patterns, as I come across uses for them.